
Digital Accessibility Guide for Faculty & Staff
This guide is designed to give you a head start on making your content accessible. It contains tips and information for creating accessible content. Included is information on using appropriate headings, making images accessible, using hyperlinks, and tips for using the Canvas Accessibility tool. An accessibility checklist is also included.
Disclosure: This guide is not intended, nor should it be relied on for legal advice regarding ADA compliance. Consult the following for legal guidance:
- Wanda L. Jenkins
General Counsel and Vice Chancellor for Legal, Audit, Risk and Compliance
wljenkins@uncfsu.edu
For equity/discrimination/harassment issues:
- Elizabeth Hunt
Assistant Vice Chancellor for Risk and Compliance
ehunt6@uncfsu.edu
For additional support, don't hesitate to contact Student Disability Services:
- Student Disability Services
(910) 672-1222
disabilityservices@uncfsu.edu
Accessibility is a Human Right under the Convention on the Rights of Persons with Disabilities Article.
The motive for making content accessible is not only to meet legal requirements but it should be a genuine desire to include everyone and break down barriers to knowledge acquisition.
What is accessibility?
The following definition for accessibility is used by the Department of Education:
“Accessible” means a person with a disability is afforded the opportunity to acquire the same information, engage in the same interactions, and enjoy the same services as a person without a disability in an equally effective and equally integrated manner, with substantially equivalent ease of use. The person with a disability must be able to obtain the information as fully, equally, and independently as a person without a disability 1.
Why make your content accessible?
Making content accessible reduces barriers to comprehension. It also ensures that you remain in compliance with the Americans with Disabilities Act (ADA). Making your content accessible has a positive impact on student learning.

Equal Access for Persons with Disabilities
Persons with disabilities will have equal access to content and barriers to comprehending materials will be reduced when content is made accessible. For example, a person with hearing impairment may not be able to know what is being said in a video unless transcripts/captions are included.

Enhanced Culture of Inclusion
Providing accessible content ensures that persons with disabilities do not feel isolated from the university community. When content is not accessible, a person with a disability is automatically excluded from the rest who have no disability.

Awareness of Disabilities
Making content accessible also ensures that you and others remain aware of various disabilities. For example, avoiding using certain colors for emphasis means you are aware of visual impairments.

Improve Image of the University
Supporting accessibility improves the University's image. When persons with disabilities are included and do not feel excluded, the image of the University improves, as opportunities are provided to all members of the community, including people with health conditions or impairments.
Section 504 of the Rehabilitation Act mandates all institutions of learning that are publicly funded to make all programs accessible to students who have disabilities.
According to ADA.gov;
The Americans with Disabilities Act (ADA) was signed into law on July 26, 1990, by President George H.W. Bush. The ADA is one of America's most comprehensive pieces of civil rights legislation that prohibits discrimination and guarantees that people with disabilities have the same opportunities as everyone else to participate in the mainstream of American life -- to enjoy employment opportunities, to purchase goods and services, and to participate in State and local government programs and services. Modeled after the Civil Rights Act of 1964, which prohibits discrimination on the basis of race, color, religion, sex, or national origin - and Section 504 of the Rehabilitation Act of 1973 -- the ADA is an "equal opportunity" law for people with disabilities.
Accessibility Statistics
According to the National Center for Educational Statistics, between 2015 and 2016, about 19% of undergraduates reported having a disability. The disabilities ranged from blindness or visual impairments which can not be corrected by wearing glasses, speech or language impairments, mobility impairments, hearing impairments, psychiatric conditions, etc.
Please note: Not all students, faculty, or staff will report having a disability.
How to Make Your Digital Content Accessible
Download a step-by-step guidance on making your digital content accessible.

Top 4 Recommendations
Appropriately tag PDF:
- An untagged PDF is not screen reader-friendly. Tags include headings, text, tables, etc. Use Acrobat Pro to Autotag document.
Use high-quality scanned documents
- If you intend to use scanned documents, make sure they are quality scanned and are screen reader-friendly.
Provide descriptive alternative text
- for all images used for instructional purposes.
Provide captions or transcripts
- for all videos and audio files used for instructional purposes.
Other recommendations
- The text should be 12pt or greater. This ensures less visual strain for all readers. Use 9 pt for footnotes.
- Use appropriate level headings and titles. This helps screen readers recognize and follow the proper reading order.
- Avoid using flickering or flashing content when possible as it can trigger seizures in people who are susceptible.
- Instead of using URLs, use meaningful hyperlinks. Hyperlinks are the best way to direct readers to online locations. URLs are often too long, and easily misunderstood by readers and accessibility tools alike. A hyperlink is easily recognized by readers and screen reading software.
- Color contrast. Use appropriate color contrast between text and background. For more information on color contrast, visit WAI's color contrast page.
- Table formatting. Use appropriate table formatting which includes header information for rows and/or columns for all tables used. This helps screen readers recognize and follow the appropriate reading order.
- Emphasis. When possible, avoid using color, bold, or italics for emphasis. They might not work well with screen readers. Use semantic tags instead <strong> and <em> (italics).
- Use the List feature when you create lists. Using the built-in feature helps a screen reader to recognize the list.
- Identify the language for all content you create. When you set the document language in a PDF, some screen readers can switch to the appropriate language.

Introduction
FSU faculty, students, and staff have access to Adobe Creative Cloud apps, including Adobe Acrobat. Adobe Acrobat can be used to check the accessibility of PDF documents. This section walks you through using Adobe Acrobat Accessibility Checker.
Please note that to follow the instructions in the module, you must first ensure that you are NOT using the “New Acrobat.”
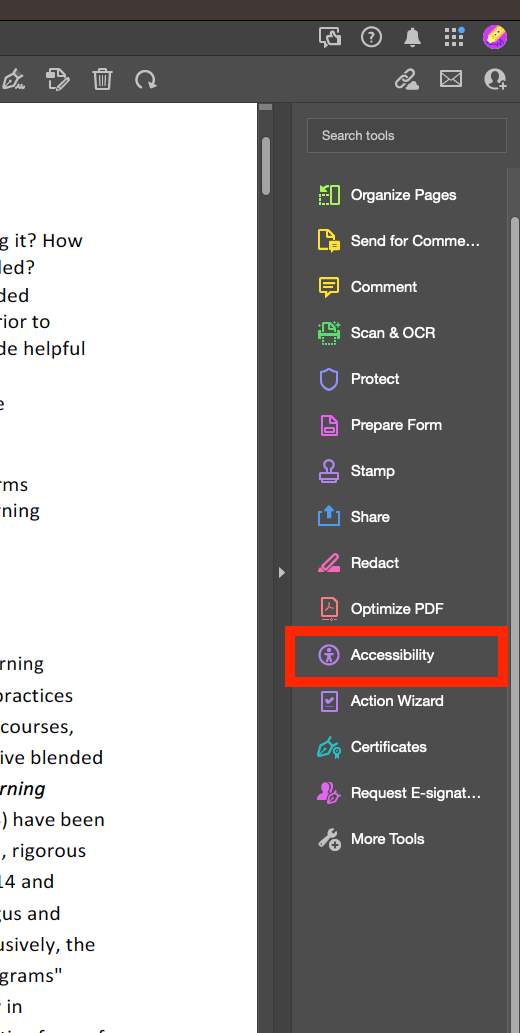
Locate Accessibility Tool
To use the Accessibility Checker tool in Adobe Acrobat, locate Accessibility under tools.
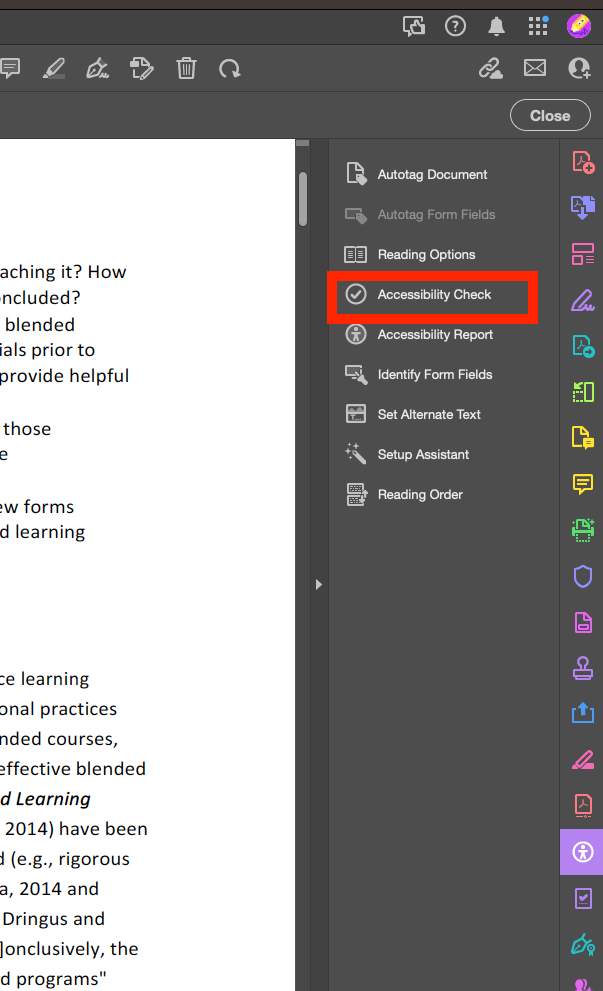
Click on Accessibility Check
Click on Start Checking
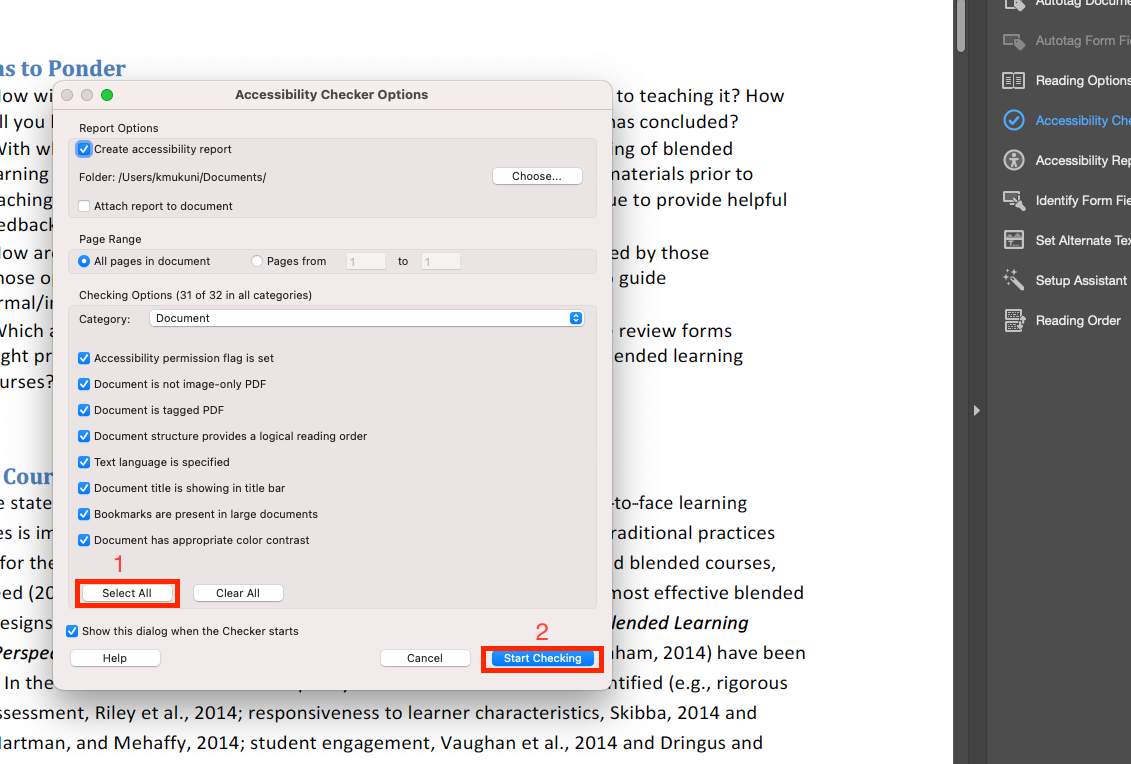
Under Accessibility Checker Options, ensure that all items are selected. Click Select All (1) to select all options. Click on Start Checking to begin the process (2).
Full Accessibility Report
To view a full accessibility report, click on Accessibility Report (1). The report will be shown on the left (2).
You can check the accessibility of your content in Canvas's Rich Content Editor. The tool checks for common accessibility errors within the editor.
How to use Canvas Accessibility Checker
The following walks you through how to use Canvas Accessibility
Step 1
To use the accessibility checker, open your Rich Content Editor by clicking on 'Edit'.

Step 2
Click on the accessibility icon at the bottom right of the Rich Content Editor.
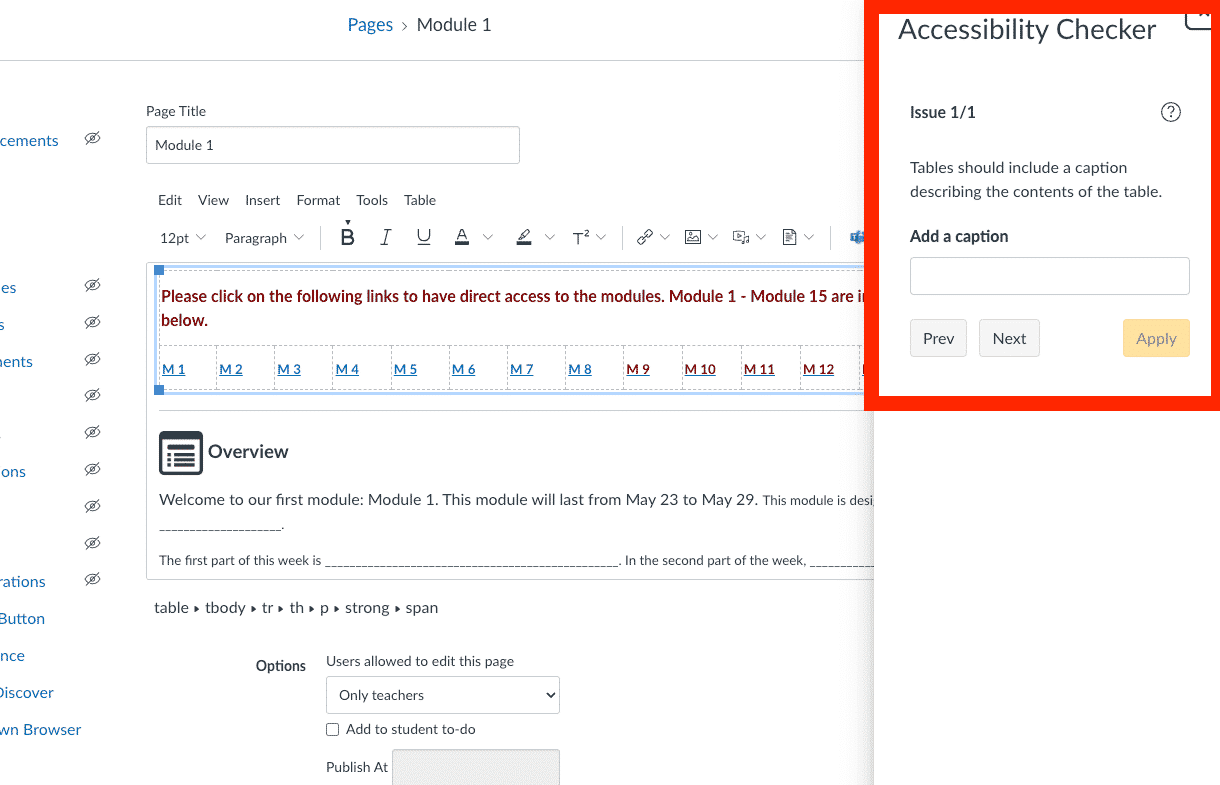
Step 3
The Accessibility Checker will open showing accessibility issues. You can address the issues in the checker (change headings, add captions to tables, add alternative text to images withing the Rich Content Editor). When you address the issue, click 'Apply' to save your changes.
Using descriptive links in canvas
Instead of a URL, consider providing a descriptive hyperlink. For example, instead of listing https://www.sde.idaho.gov/_files/district/CTD-Accessible-Student-Content.pdf, consider hyperlinking the description: Accessible Student Content.
The section below will walk you through the steps of hyperlinking text in Canvas.
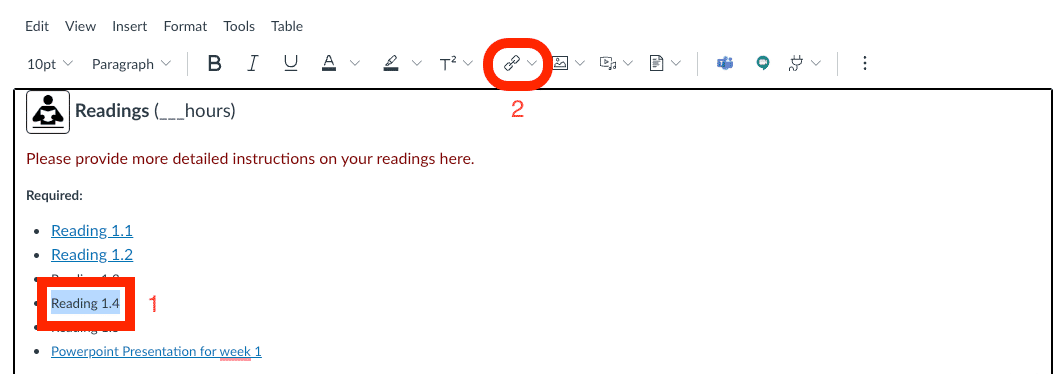
Access Text Editor
In the text editor space, provide a description of the website you want to link, and then highlight the text to be hyperlinked (1). Select the ‘Add/edit’ link as shown (2).
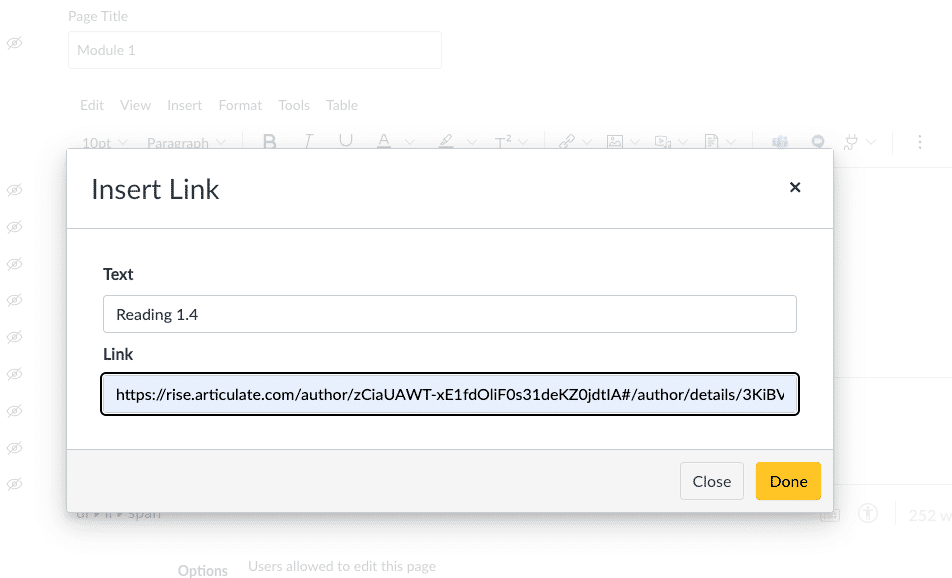
Insert Link
In the pop-up option, paste the Url in the Url box. Select ‘Done’ to keep your changes.
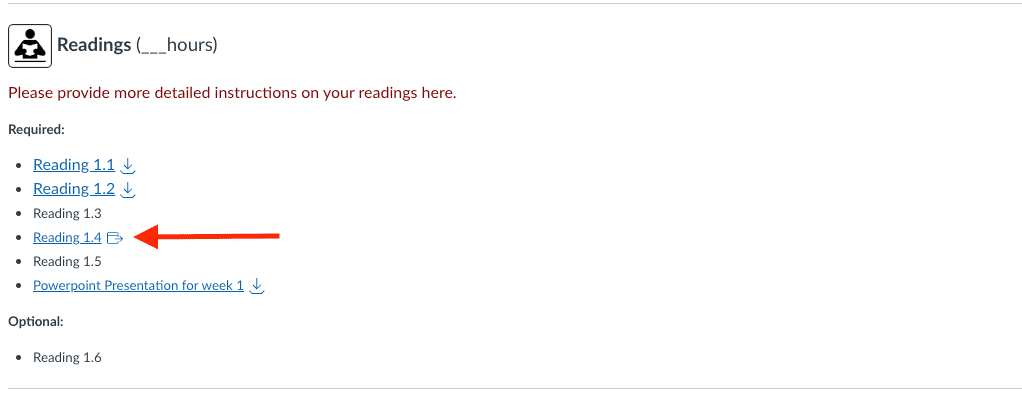
Hyperlinked Page Example
When you submit your changes, the hyperlinked text will appear underlined and may appear in a different color. When the hyperlinked text is clicked, a new window to the hyperlinked web page opens.
Introduction
You can check the accessibility of your content in Microsoft Office products (Word, PowerPoint, Excel, Outlook) using the Accessibility Checker. The accessibility checker also provides recommended actions for fixing the accessibility of your content. This section walks you through using the Accessibility Checker in Word and PowerPoint.
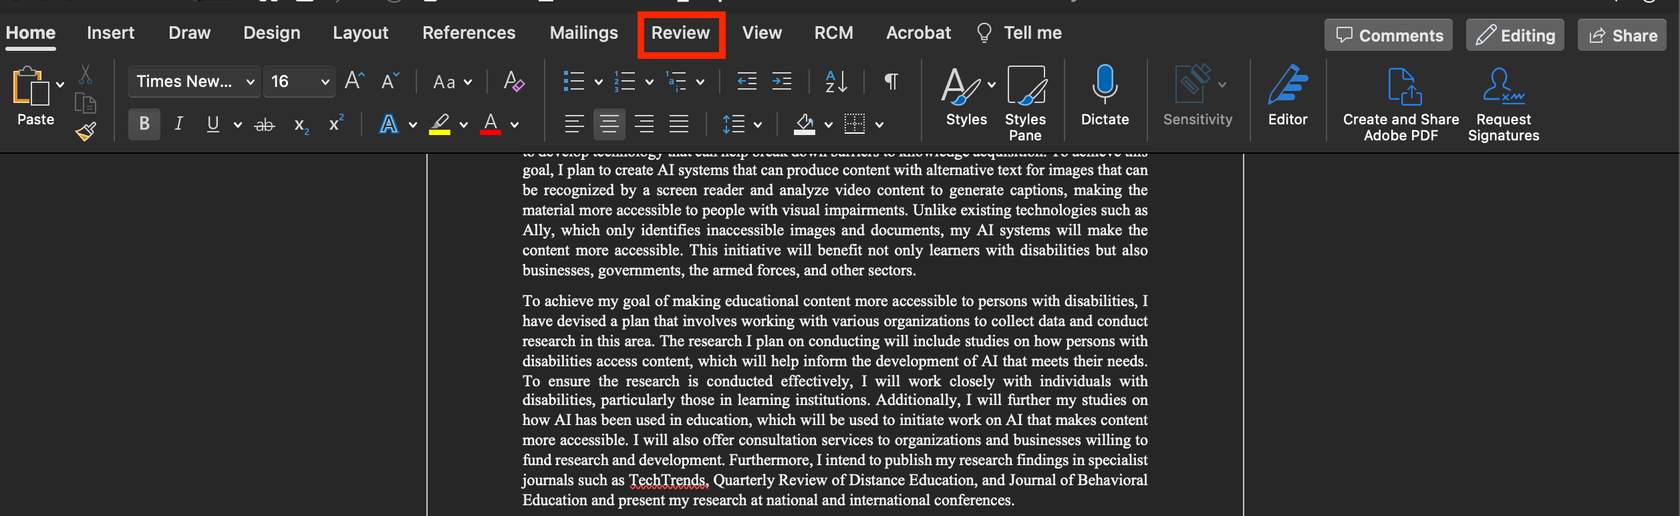
Locate the Review Tab
To locate the Accessibility Checker in Word or PowerPoint, click on the Review tab.
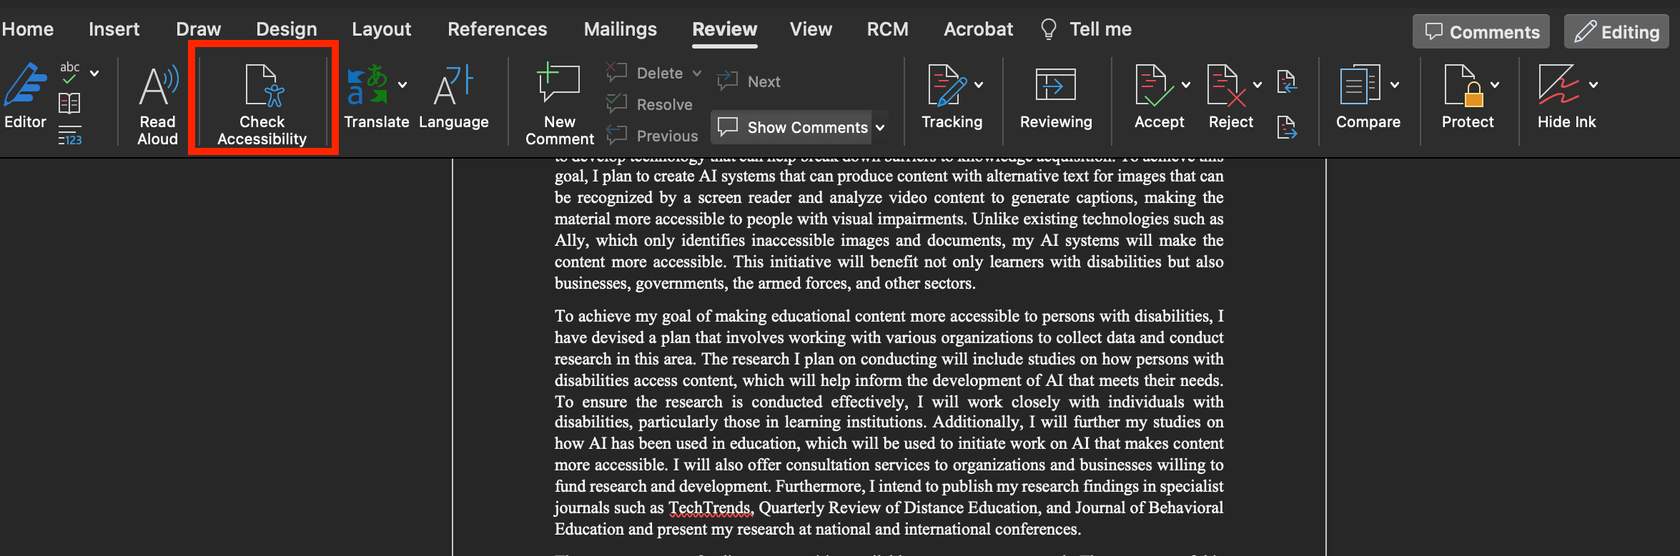
In Word, Click on Check Accessibility
Click on Check Accessibility in Word.
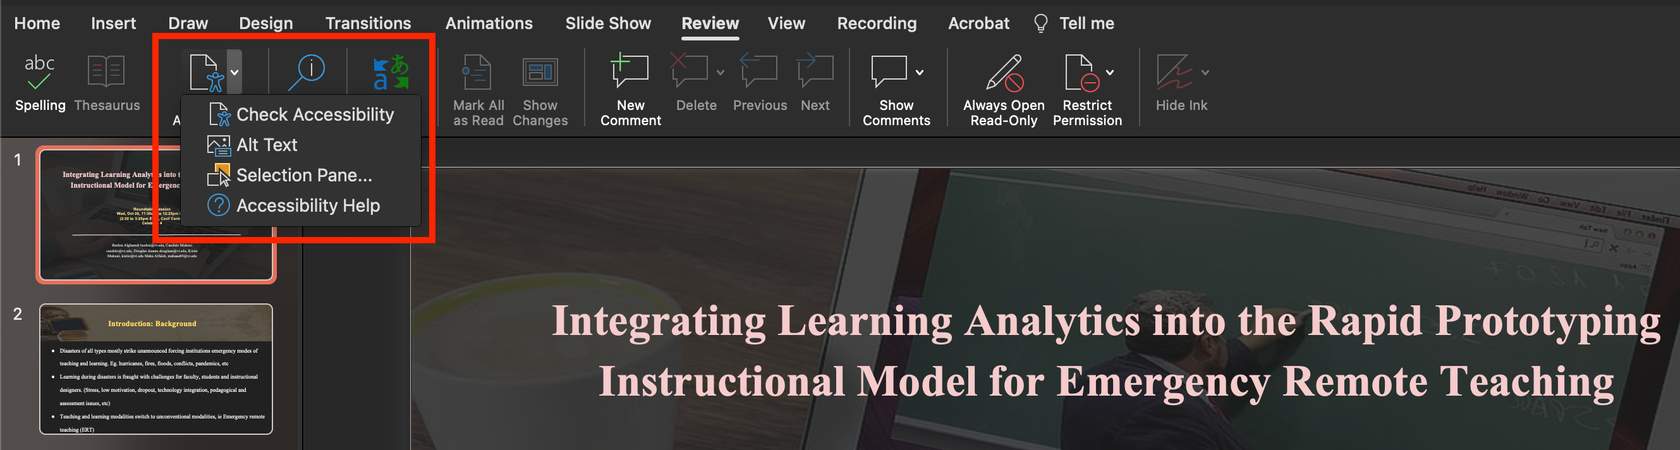
In PowerPoint, Click on the Accessibility Icon
When you click on the dropdown menu on the accessibility icon in PowerPoint, various options are presented. Select Check Accessibility.
Microsoft Office Accessibility Checker Support page.
NOTE:
Make all your Microsoft Office content accessible before converting them to PDF. Use the Microsoft Accessibility checker to identify and fix any accessibility issues before converting a Microsoft Office document to PDF.
Always use the Best for Electronic Distribution and Accessibility (for Mac) option or the Documents structure tags for Accessibility (for Windows) option when saving a document as a PDF.
How to make you content Accessible
Accessible Microsoft Documents
Some main accessibility issues with Microsoft documents include a lack of alt-text for images, improper or lack of headings, inaccessible lists, and inaccessible tables.
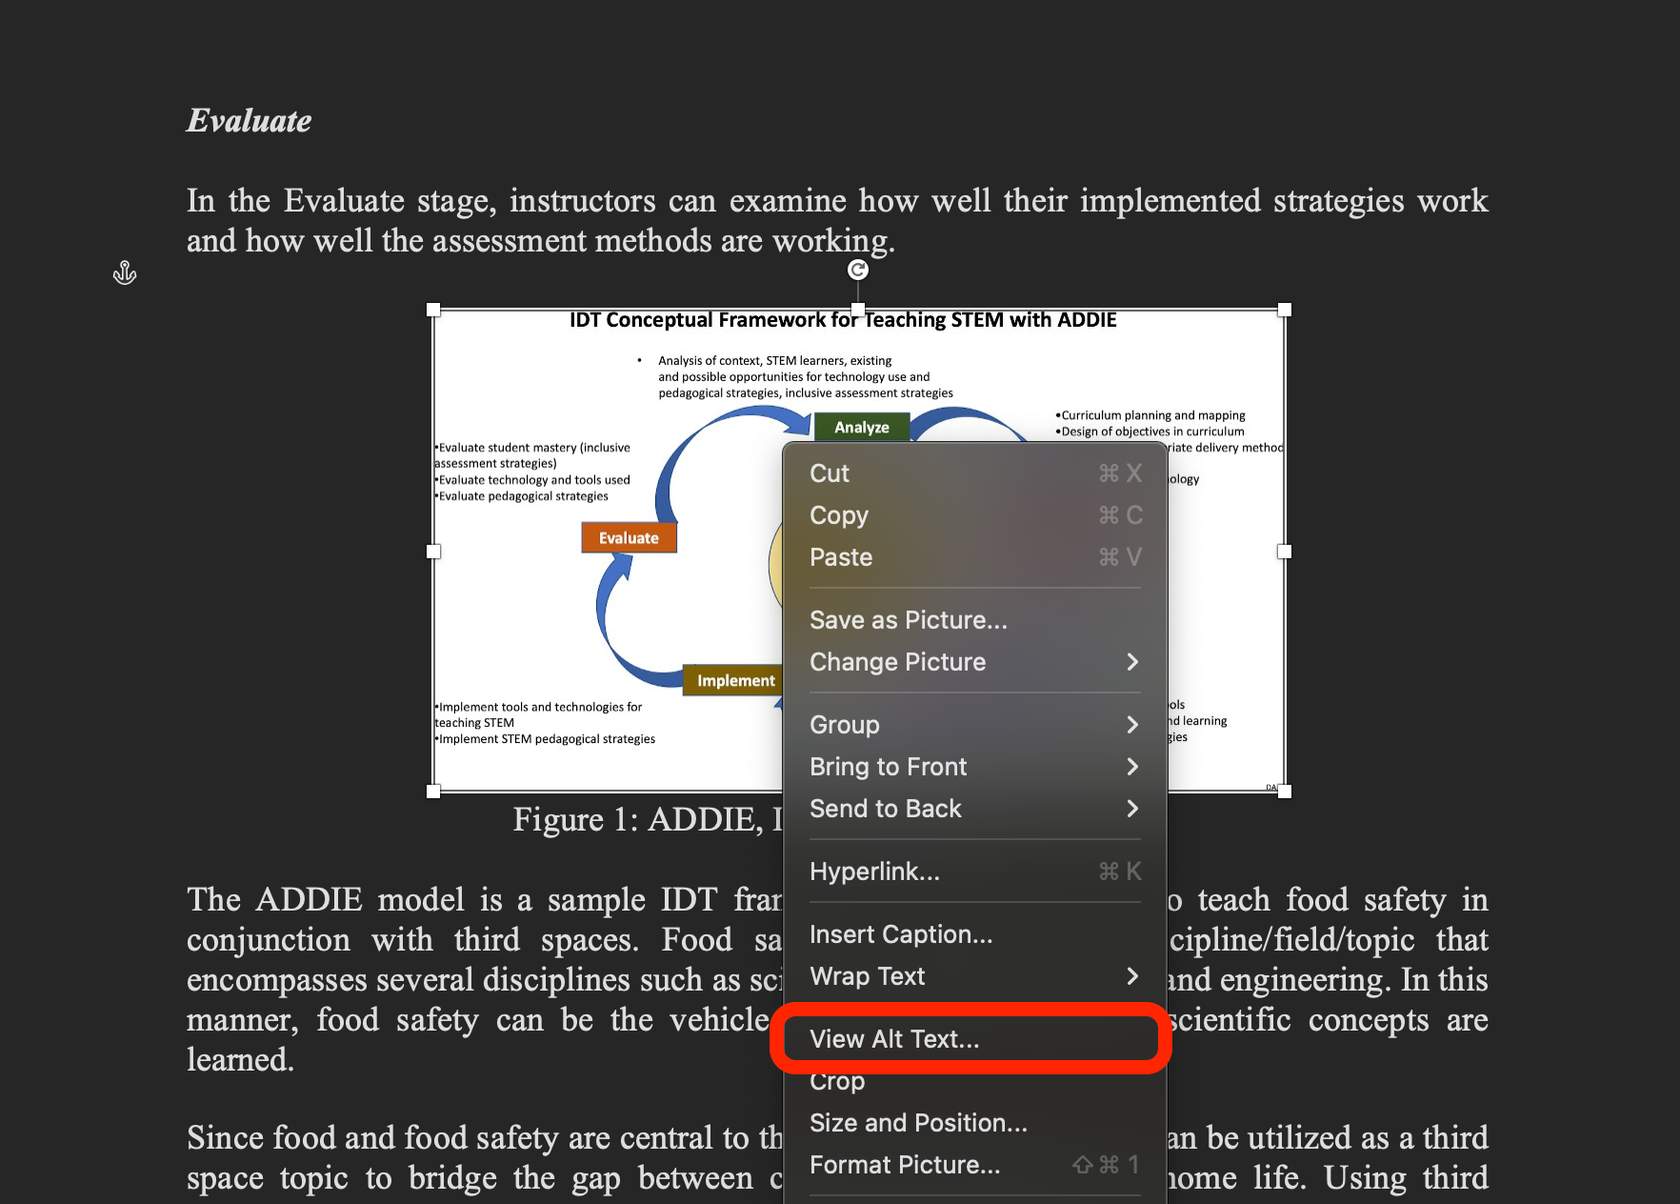
Adding alt-text to images/visuals
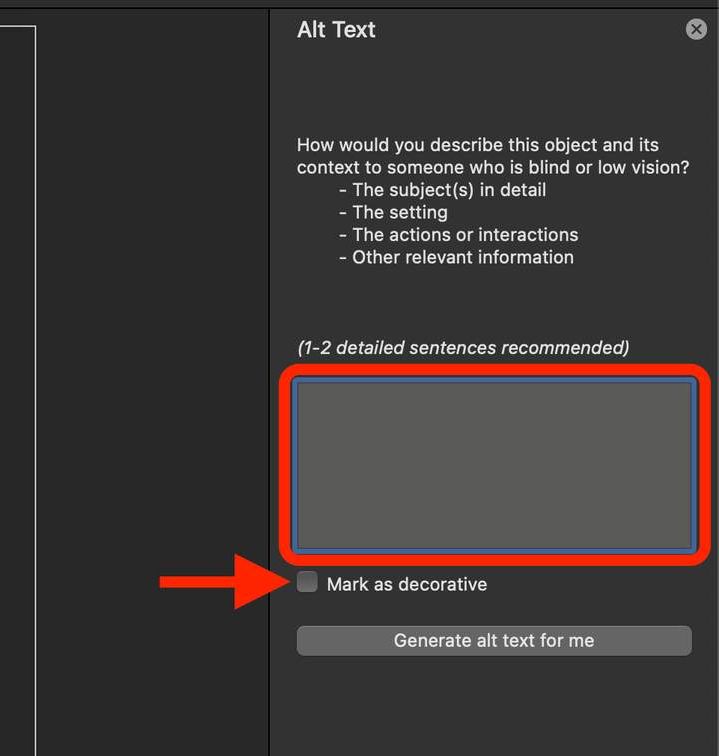
Adding descriptions to images helps individuals using screen readers recognize the meaning of the image/visual. To add alt-text to an image in PowerPoint or Word, locate the image/visual and right-click on it. Select ‘View alt text’. In the open Alt Text tab, describe the image and context so a person using a screen reader can understand. Check the ‘Mark as decorative’ box if the image has no instructional purpose.
Alt text guidelines
The following are guidelines from Havard on using alt-text:
&rlquo;Add alt text to all non-decorative images.
Keep it short and descriptive, like a tweet.
Don’t include &;dquo;image of” or “photo of.”
Leave alt text blank if the image is purely decorative
It’s not necessary to add text in the Title field.”
-Source
Headings
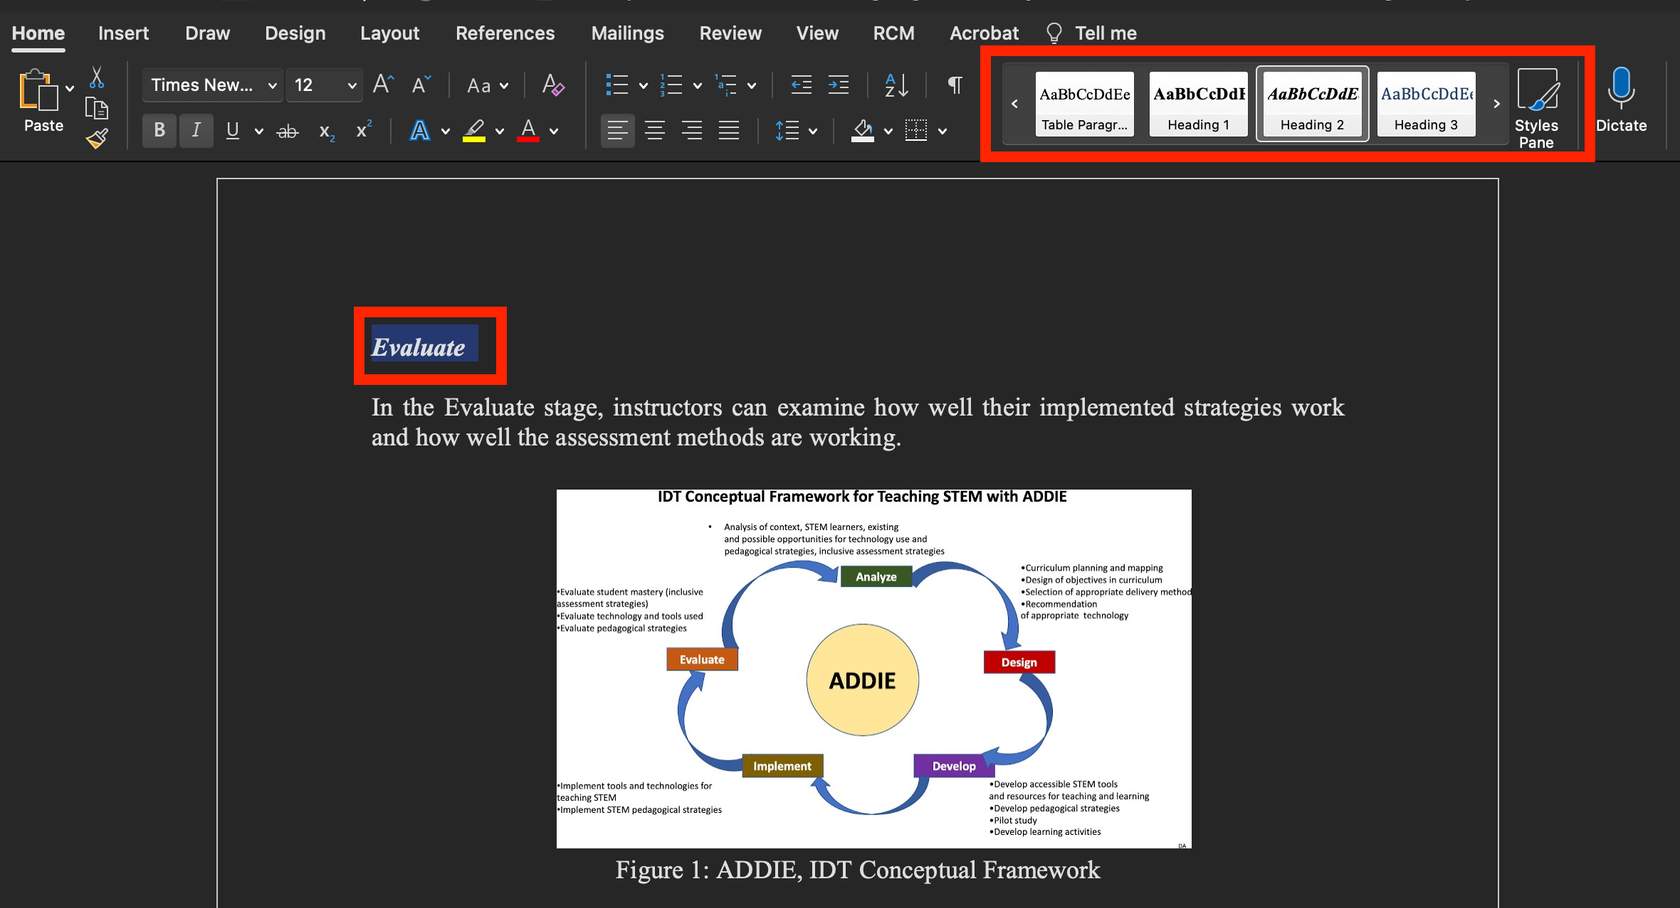
Be sure to use proper headings for your documents. This helps a screen reader follow a logical order. Be sure to begin your headings at level 1.
To use headings, highlight the text and select the appropriate heading in the Styles pane.
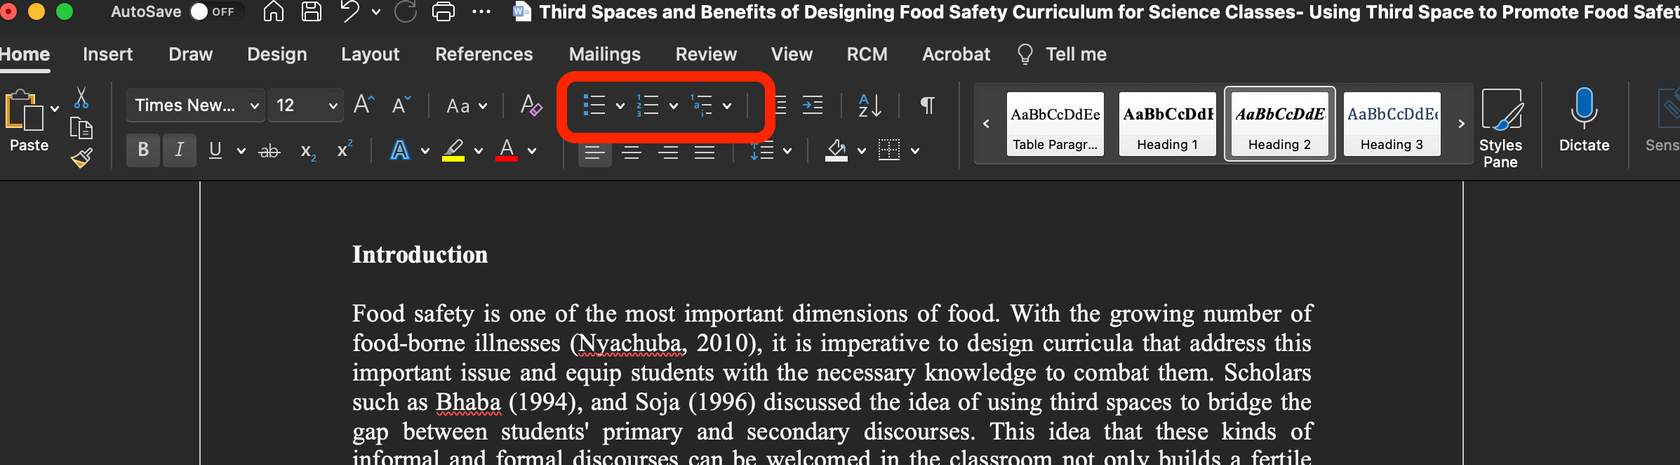
Lists
Instead of manually creating a list in PowerPoint or Word, use the built-in list feature. This helps a screen reader recognize and read out the list as intended. To create lists, highlight the text or begin a list by selecting the desired list type from the options provided.
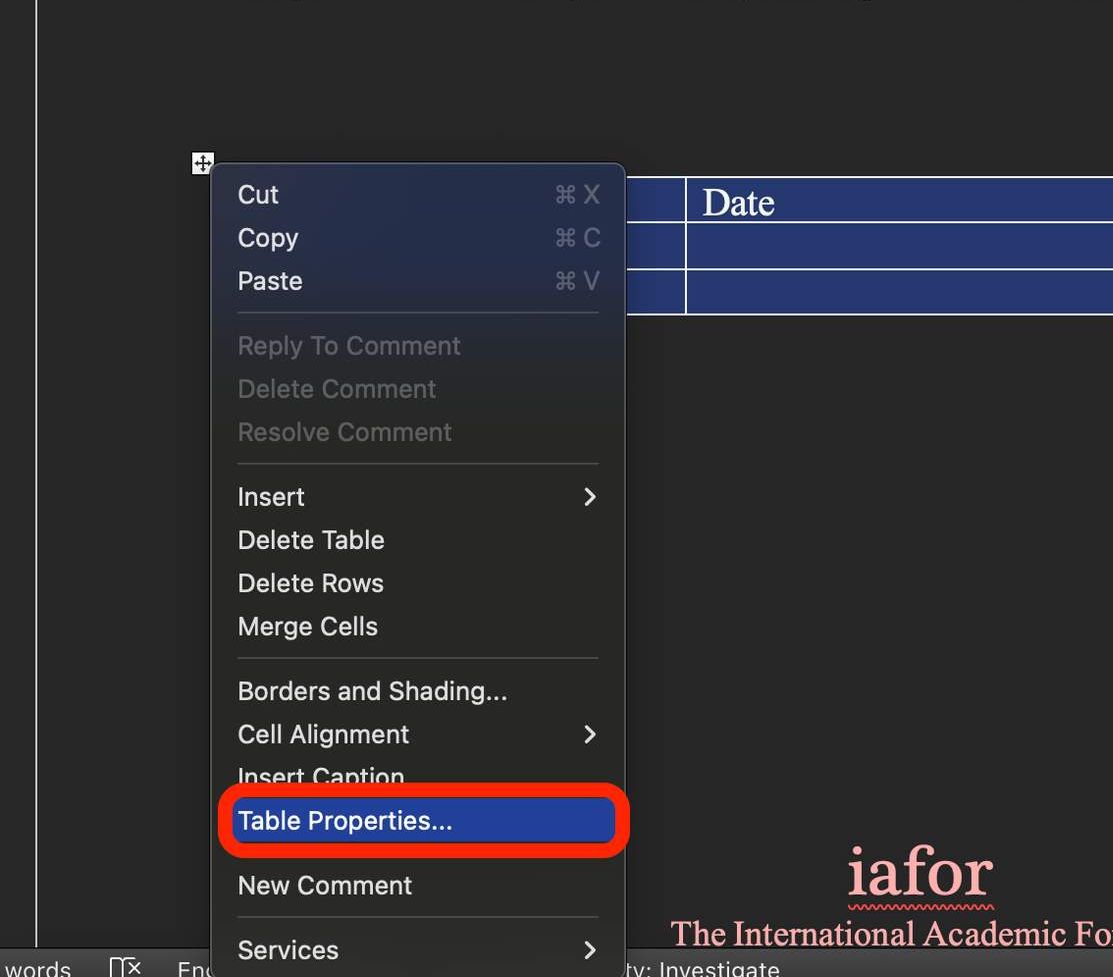
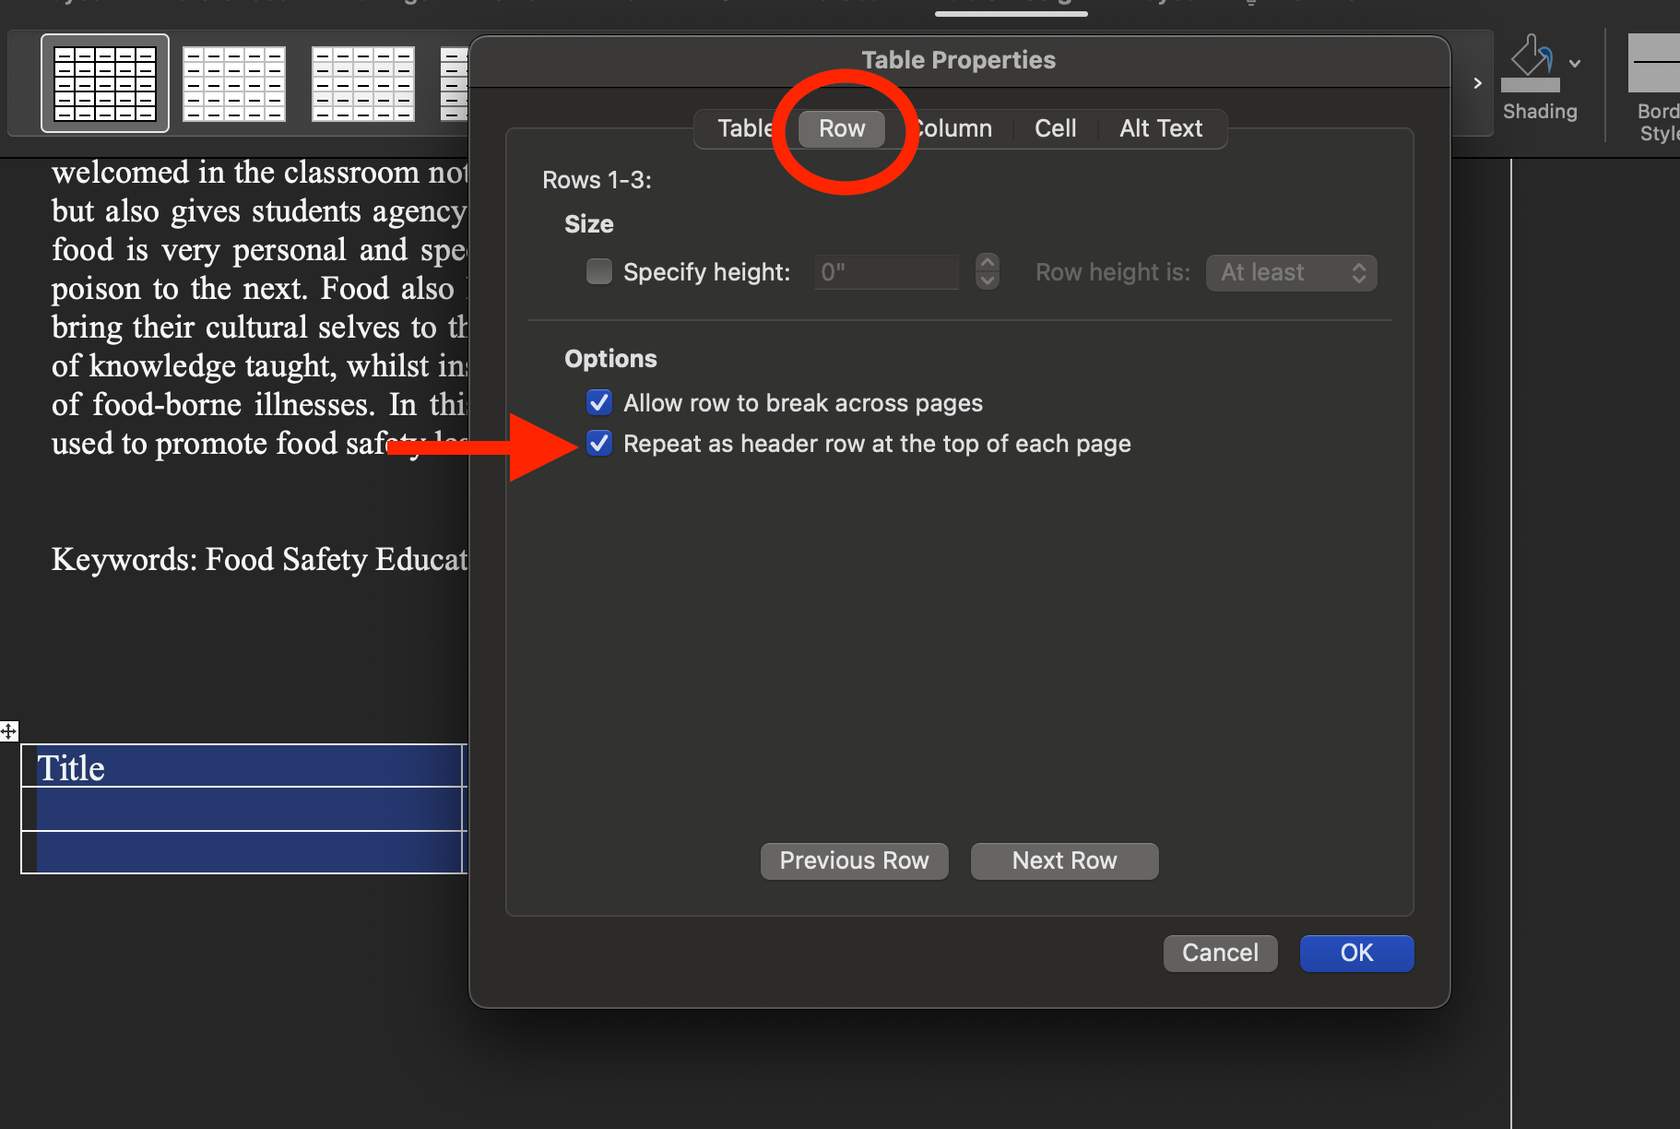
Tables
As a general rule, avoid using tables. If you have to use tables, ensure that you set designated header rows. To add designated header rows, select the table then right-click to open options. Select ‘Table Properties.’ In the pop-up menu, select ‘Rows’ at the top and check the ‘Repeat as header row at the top of each page’ option.
Adobe Acrobat Pro Action Wizard
Some main accessibility issues with PDFs include a lack of alt-text for images, poorly scanned, improper or lack of headings, lack of tags, and inaccessible tables. To resolve accessibility issues, you can run the Accessibility Action Wizard in Adobe Acrobat Pro.
As a member of FSU, you have access to Adobe Creative Cloud which includes Adobe Acrobat. You can use Adobe Acrobat to make your PDF accessible. This section will walk you through how to use Adobe Acrobat Action Wizard.
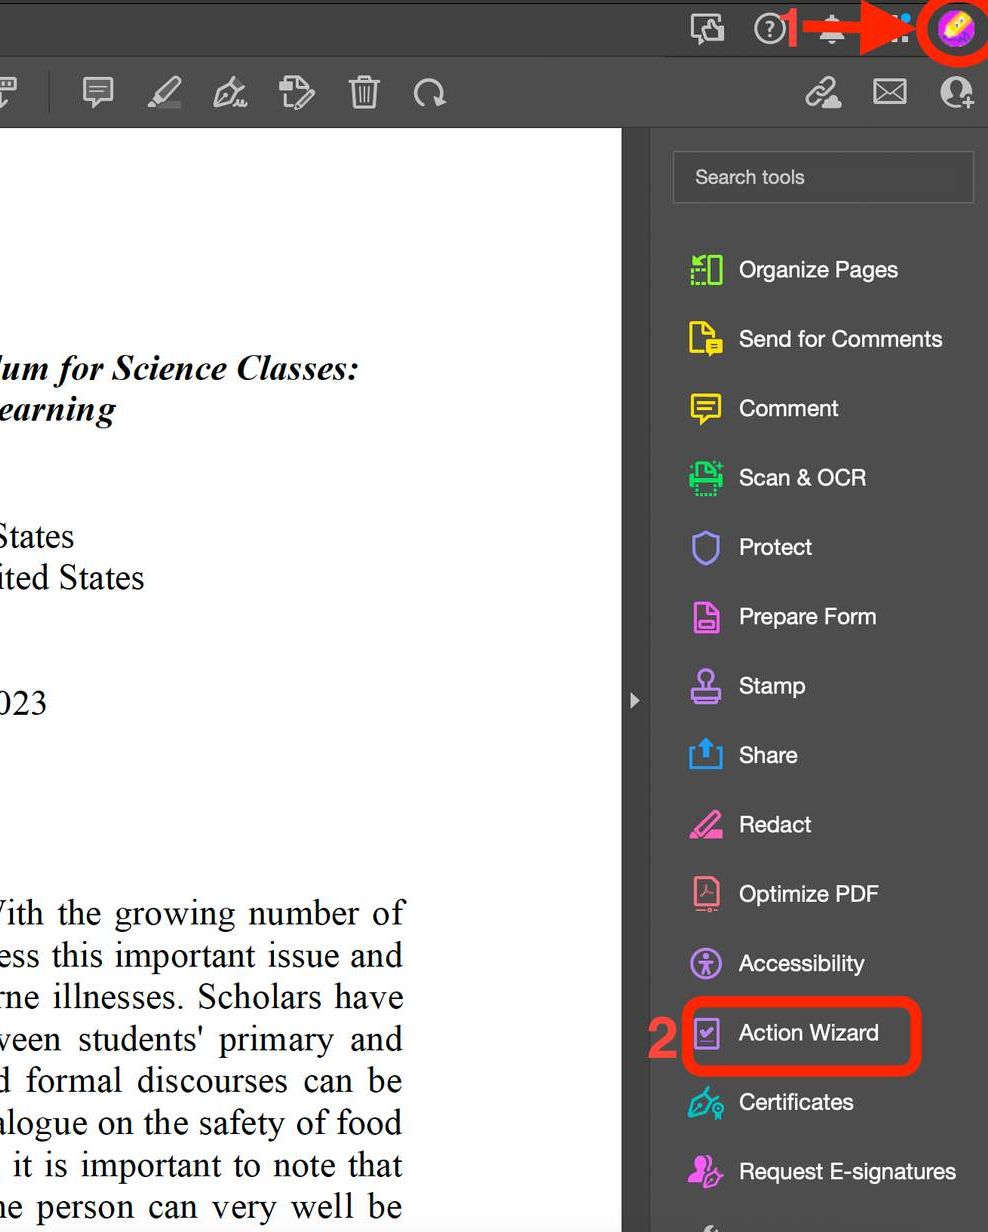
Step 1
Adobe Acrobat and locate Action Wizard.
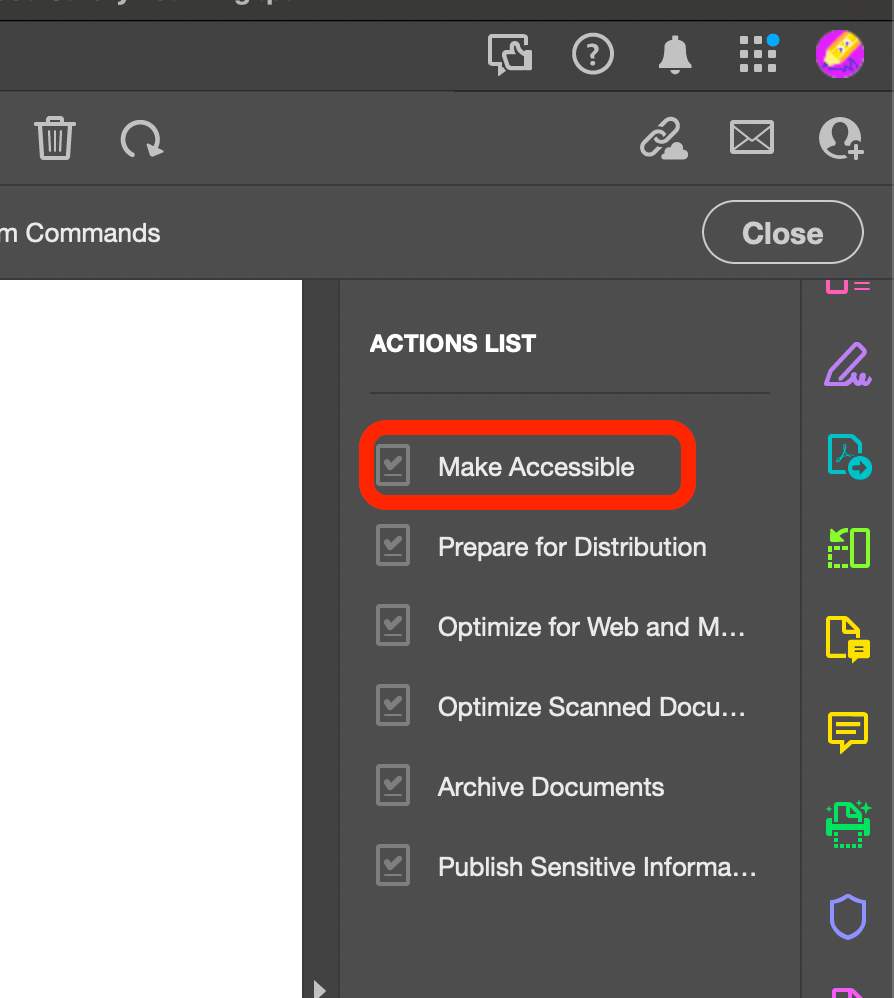
Step 2
In the open tab, select Make Accessible.
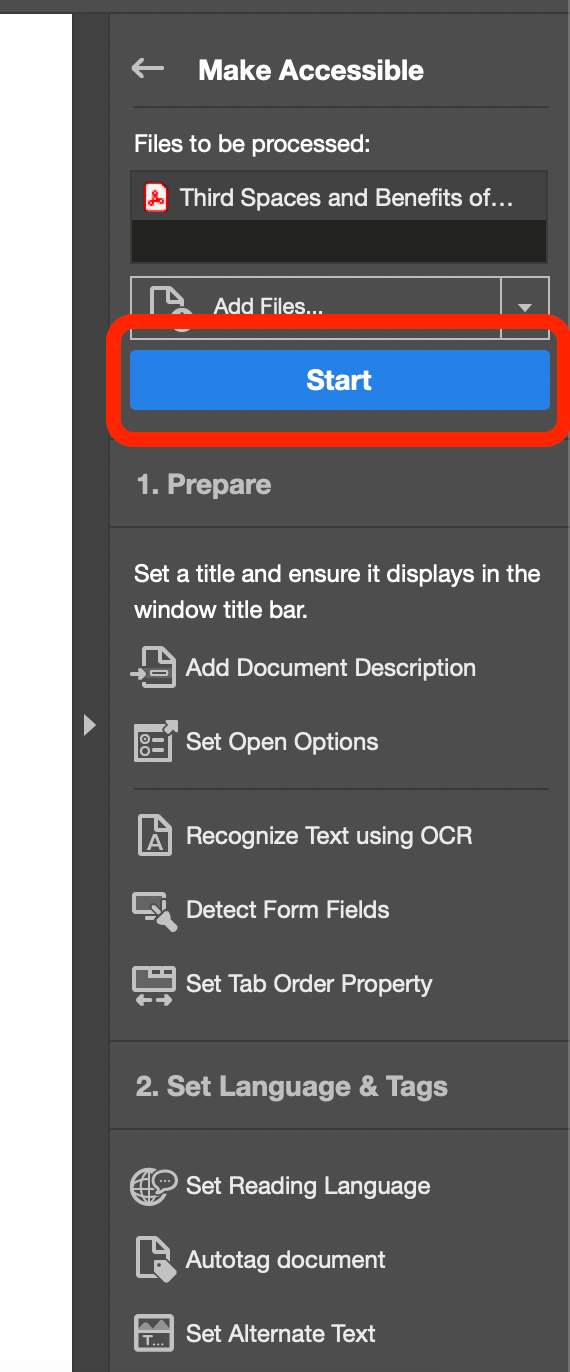
Step 3
Click on Start to begin the process.
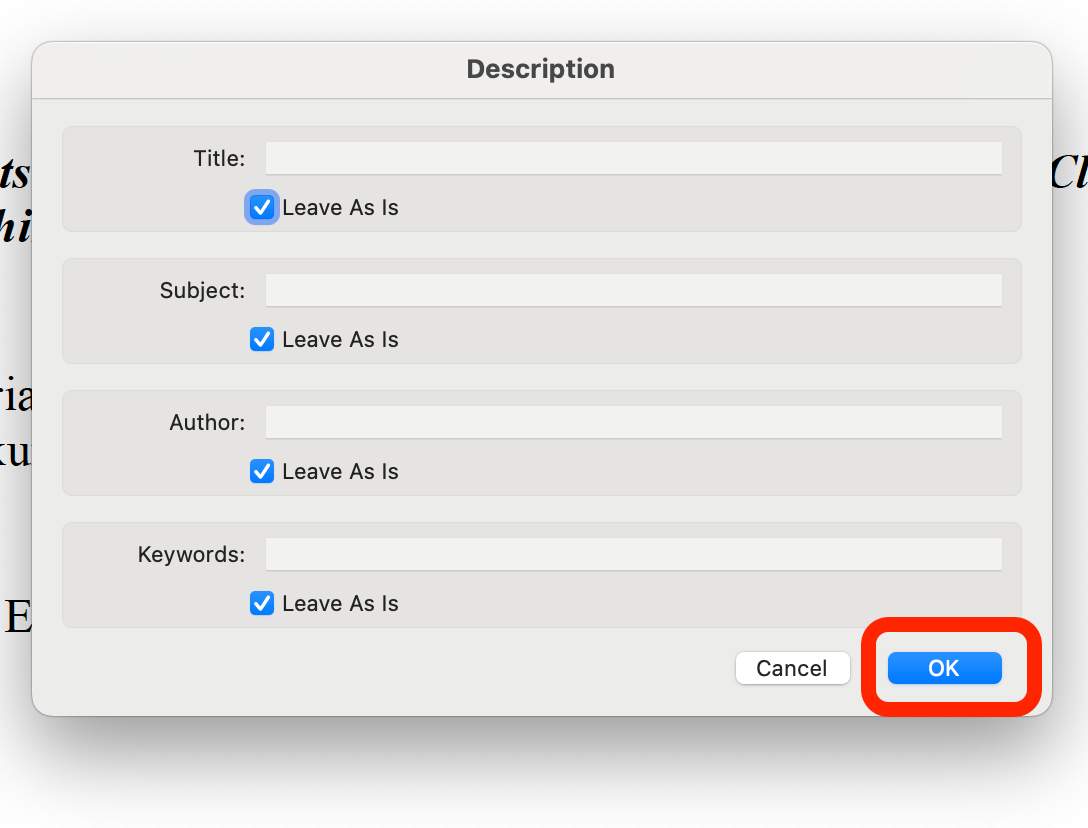
Step 4
In the open menu, include a Title and then click on OK
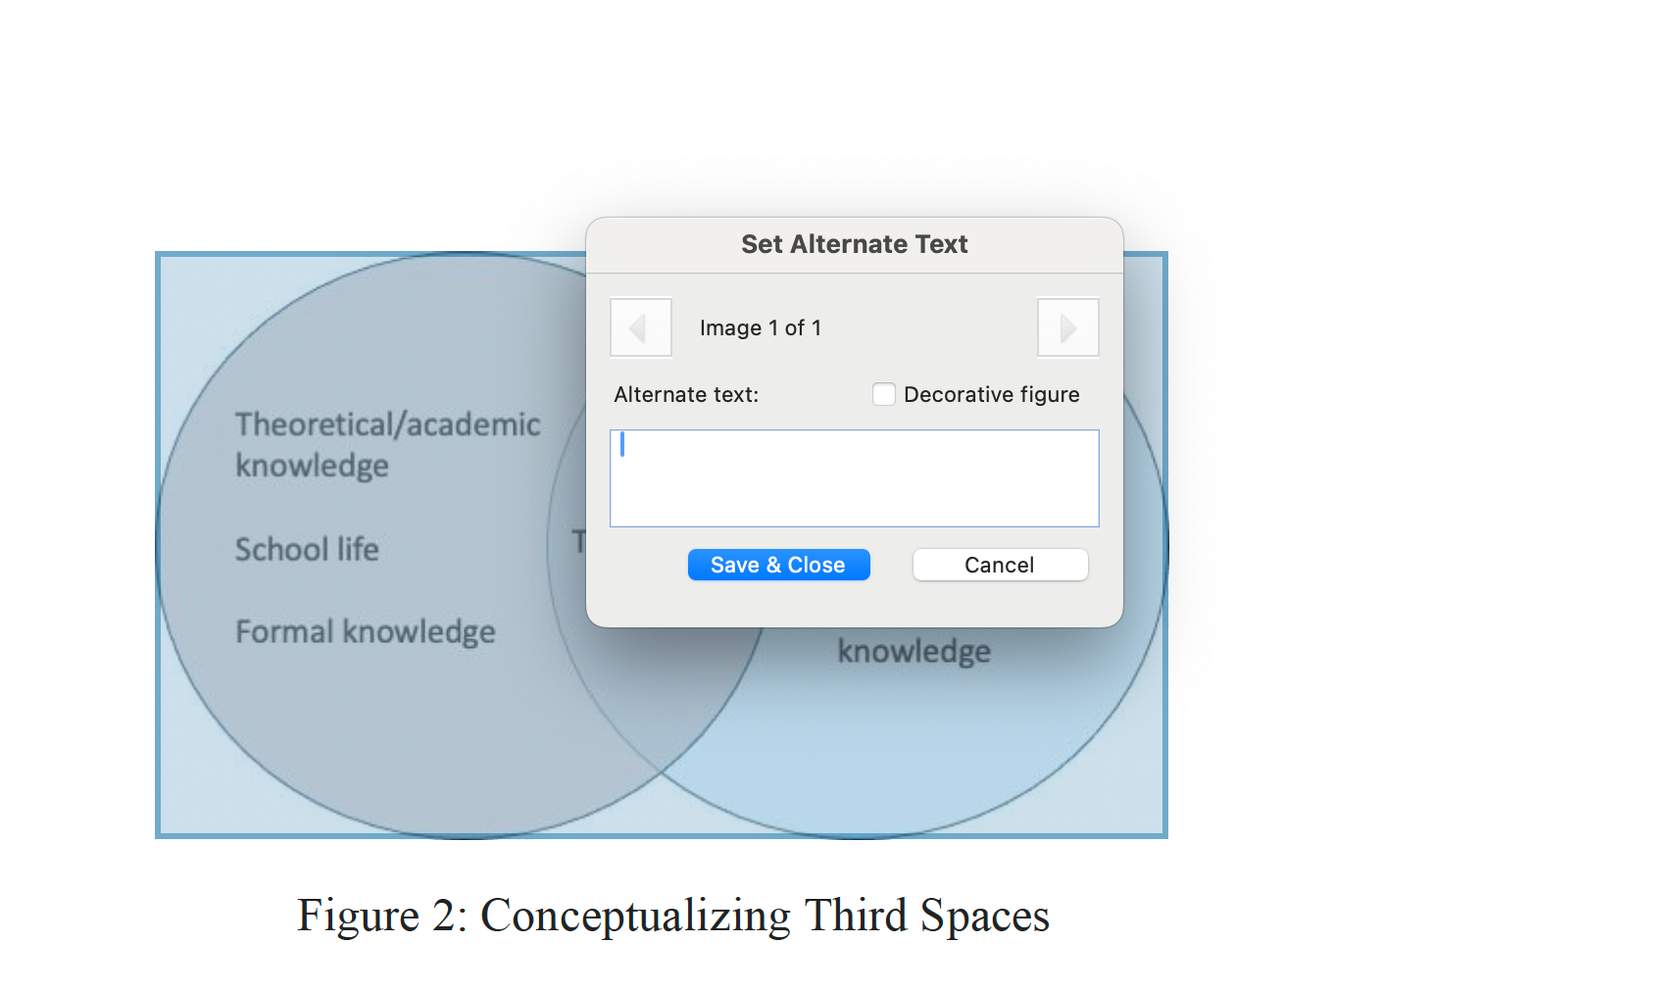
Step 5
Provide a description of the image.
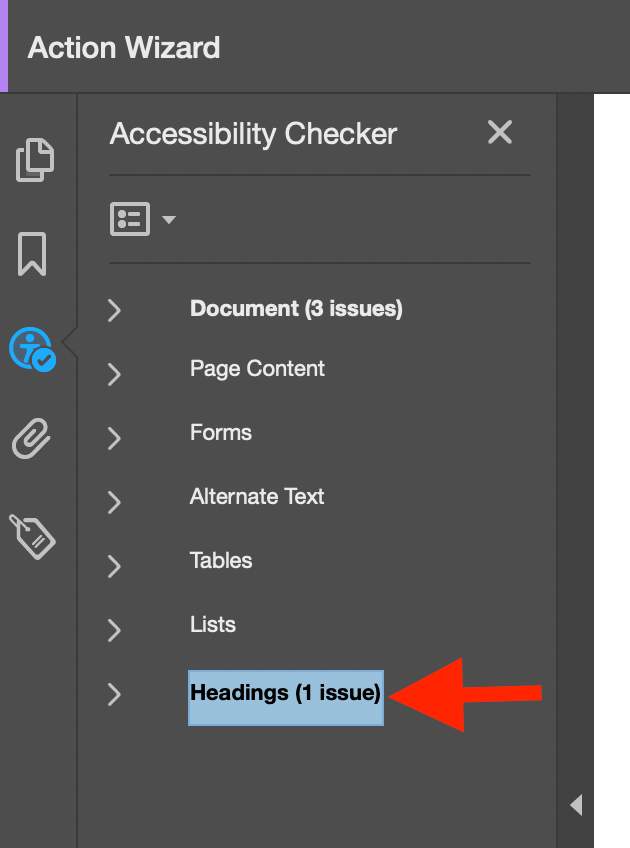
Step 6
Click on the issue to reveal more details. The issue is highlighted with a number e.g, Headings (1 issue).

Step 7
Click on the tag icon to open Accessibility tags tab. In this example, you will need to change the headings to follow a logical structure.
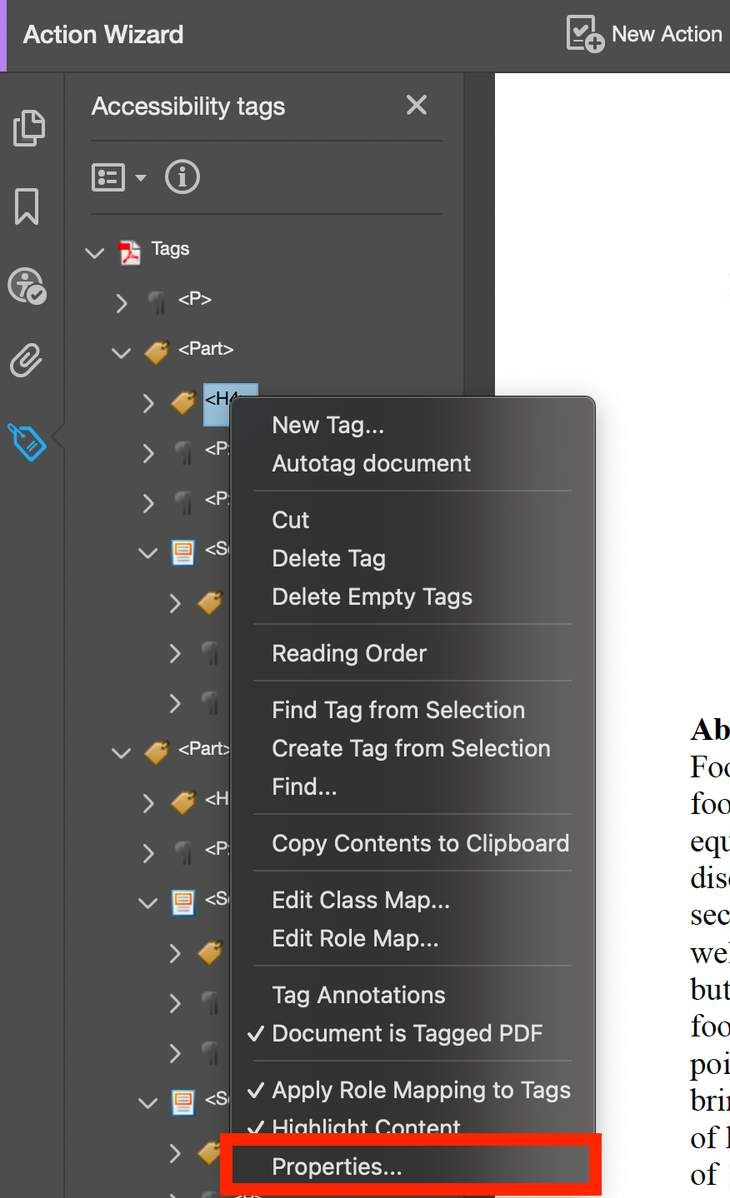
Step 8
Right click on the first
to change it to level 1. Click on Properties
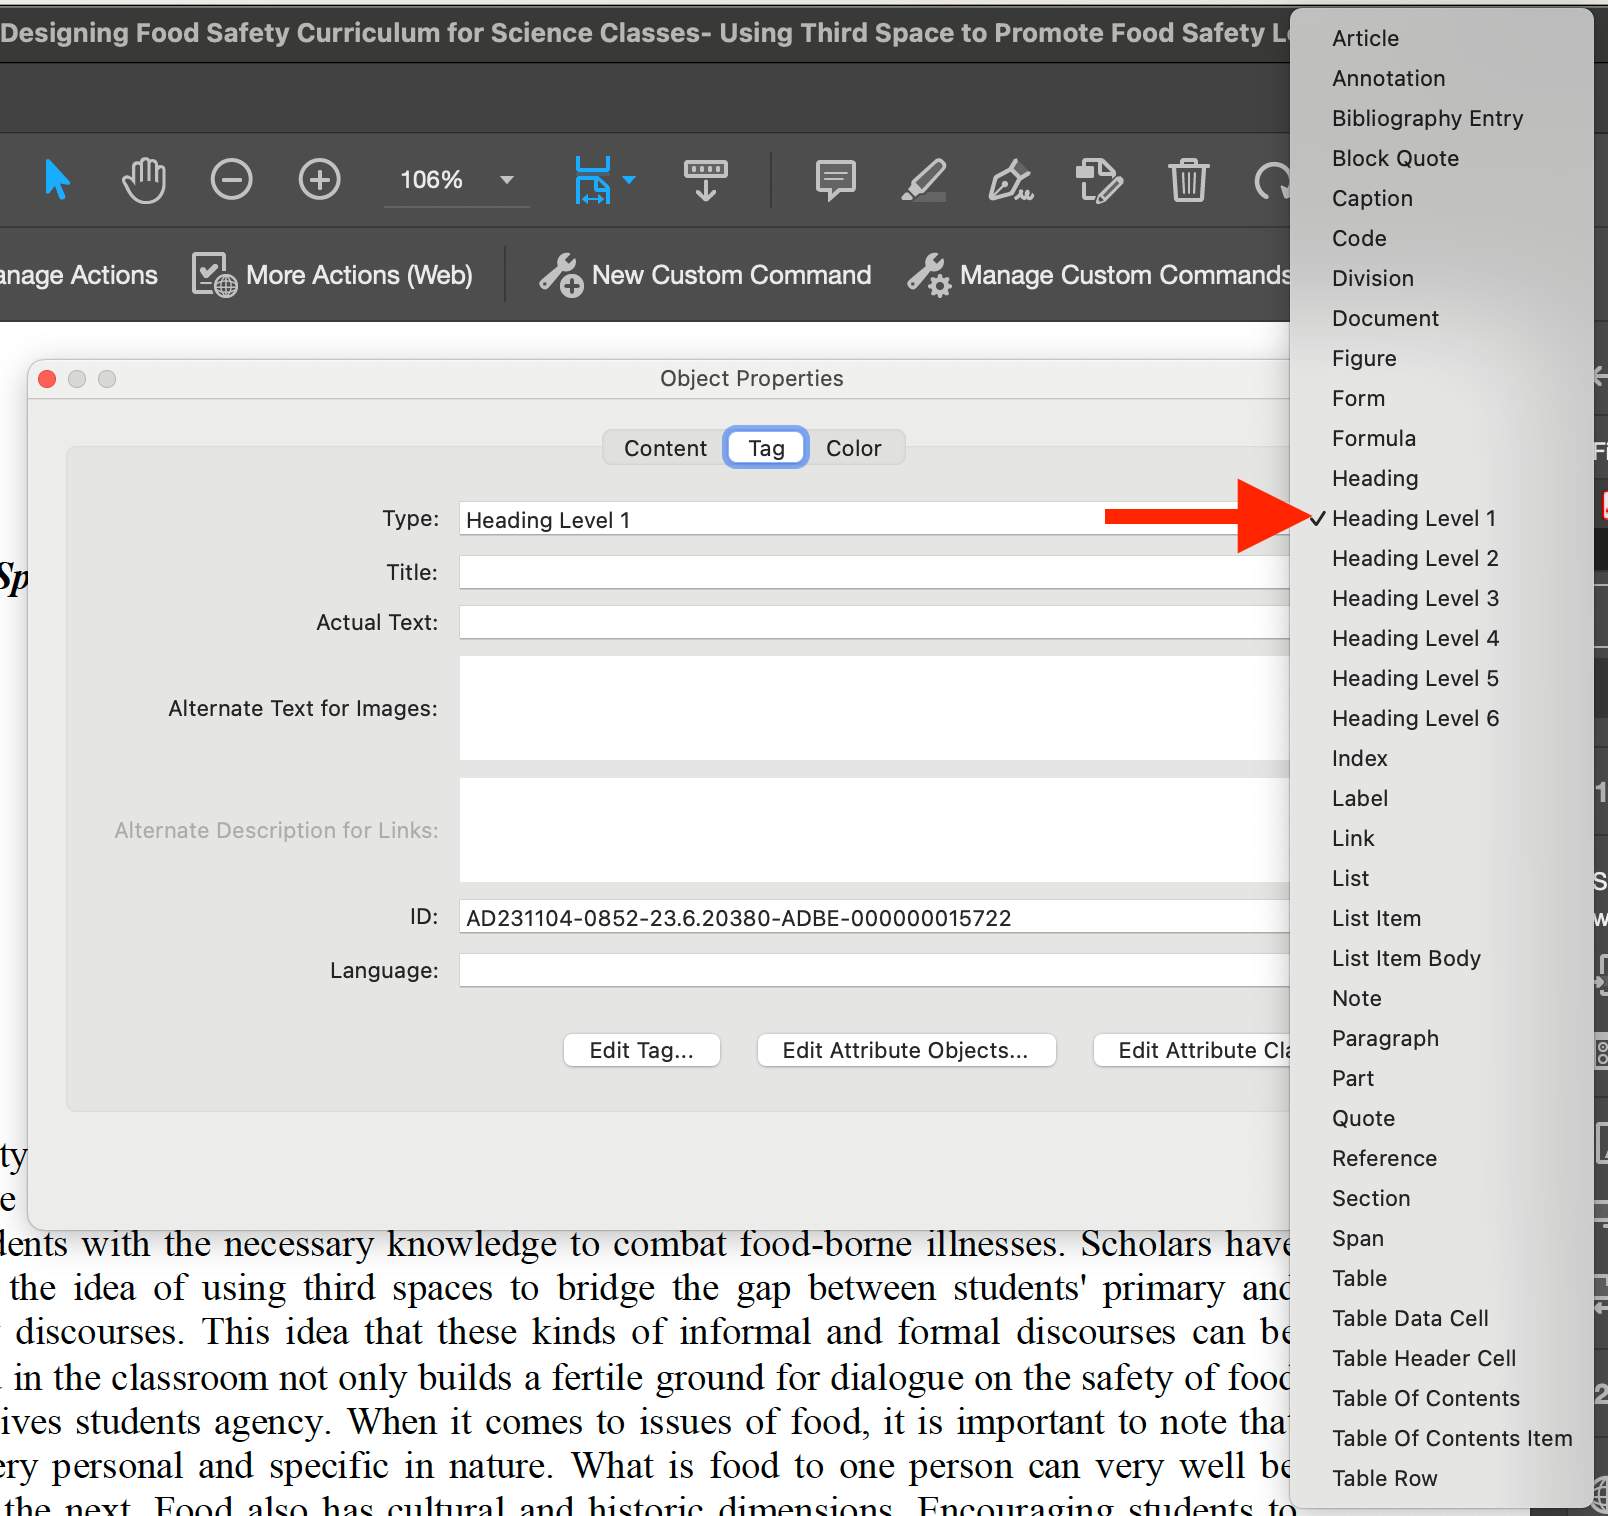
Step 9
In the open tab, select Headings Level 1. Repeat the process for the next heading level tabs until you have appropriate level headings.
Step 10
If your table has an accessibility issue, you can fix it by right-clicking on the table tag and selecting Table Editor.
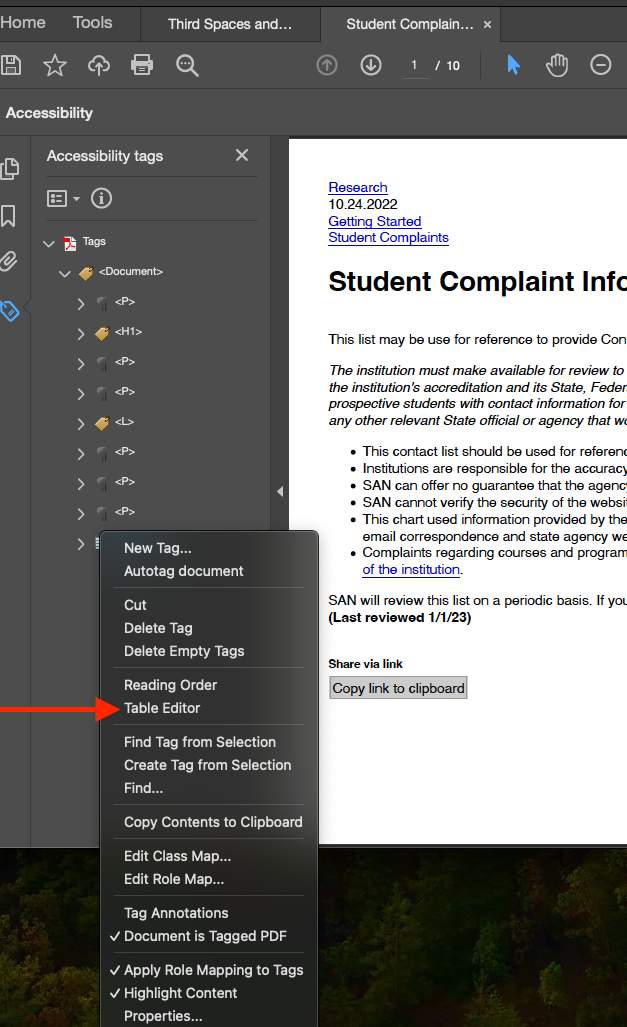
Step 11
Select Table Editor.
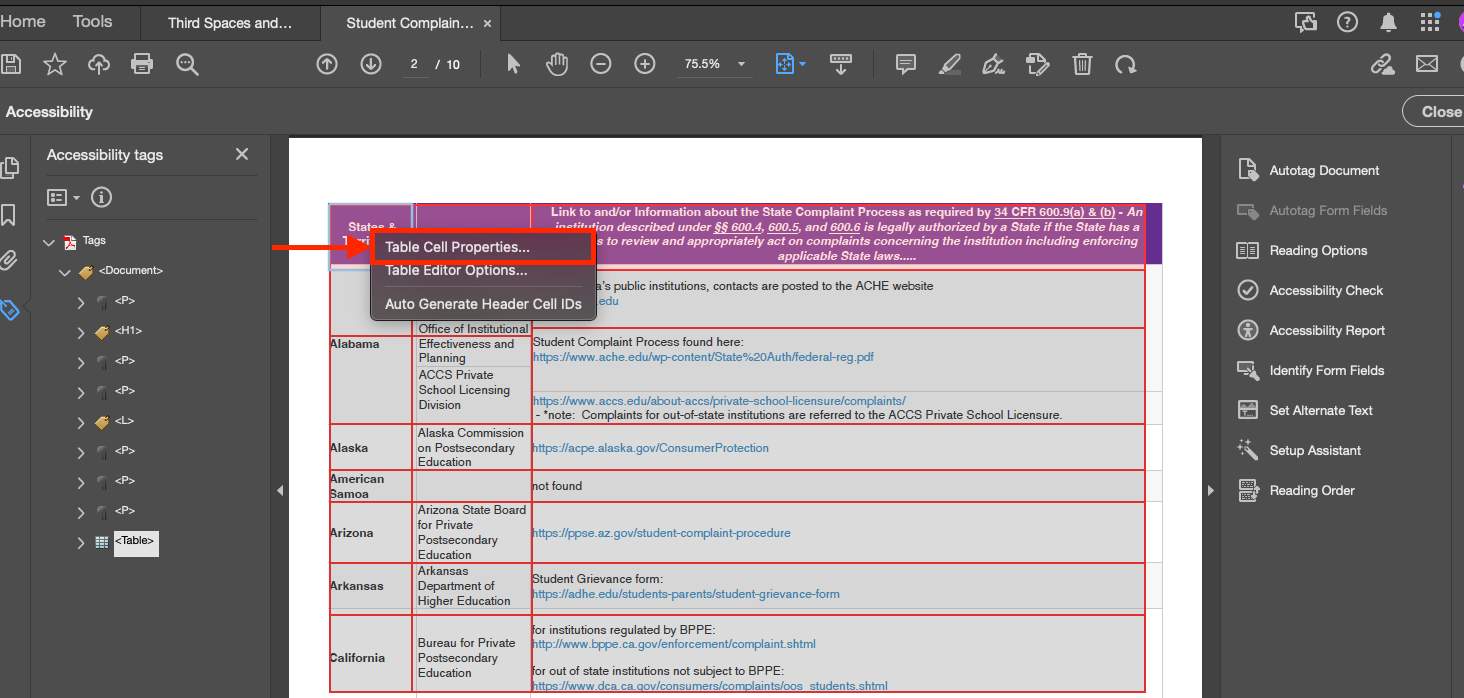
Step 12
Right click the top table cell and select Table Cell Properties.
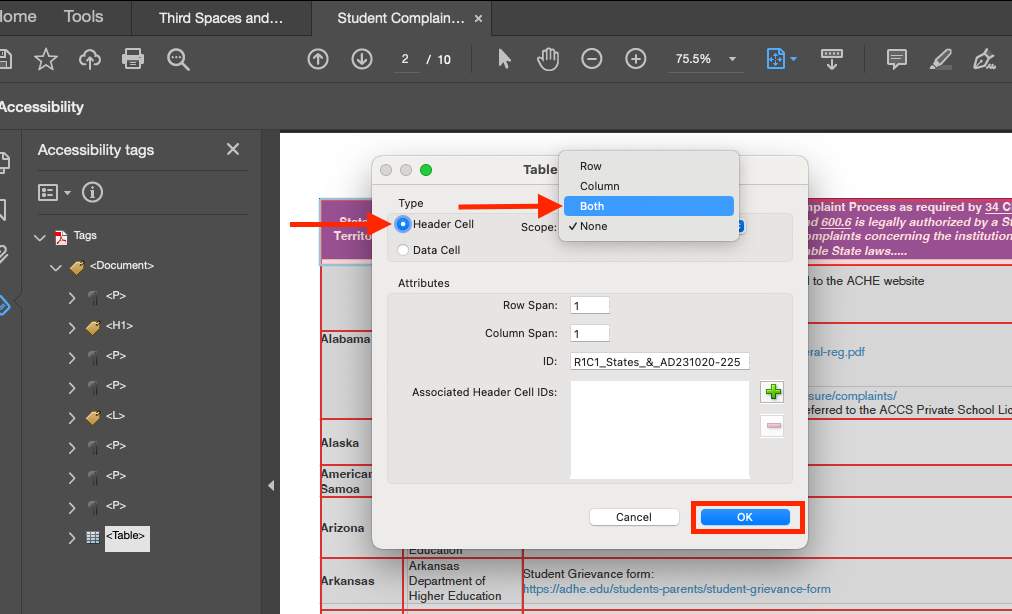
Step 13
In the open tab, select Header Cell and set the Scope to Both if your table has both row and column headers. Click OK. When table headers are set appropriately, a screen reader can recognize headers in the table and read the content appropriately.
If you are using the new Acrobat Pro version, follow the following steps:
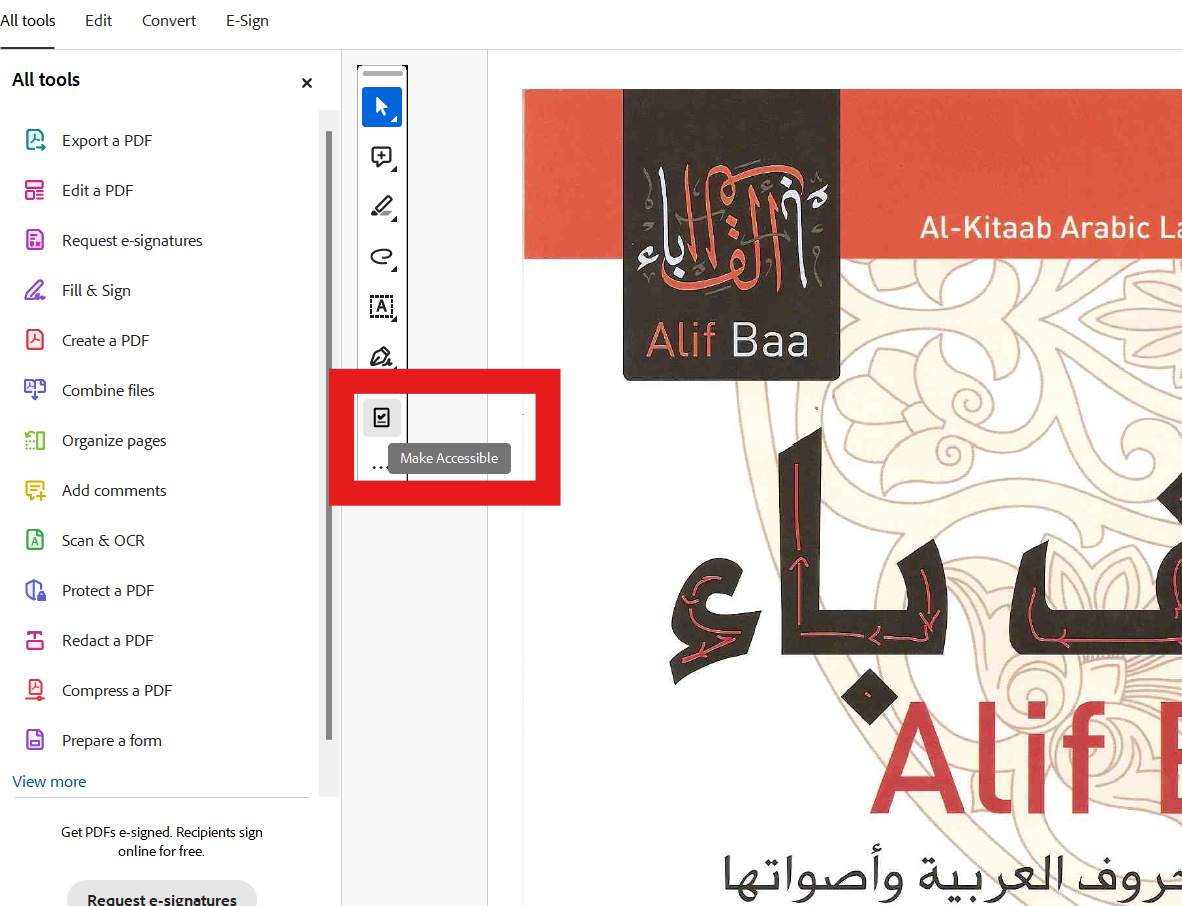
Find the Make Accessible Tool
Find the Make Accessible Tool on the left. If it's not there, follow the next steps to add it to your toolbar.
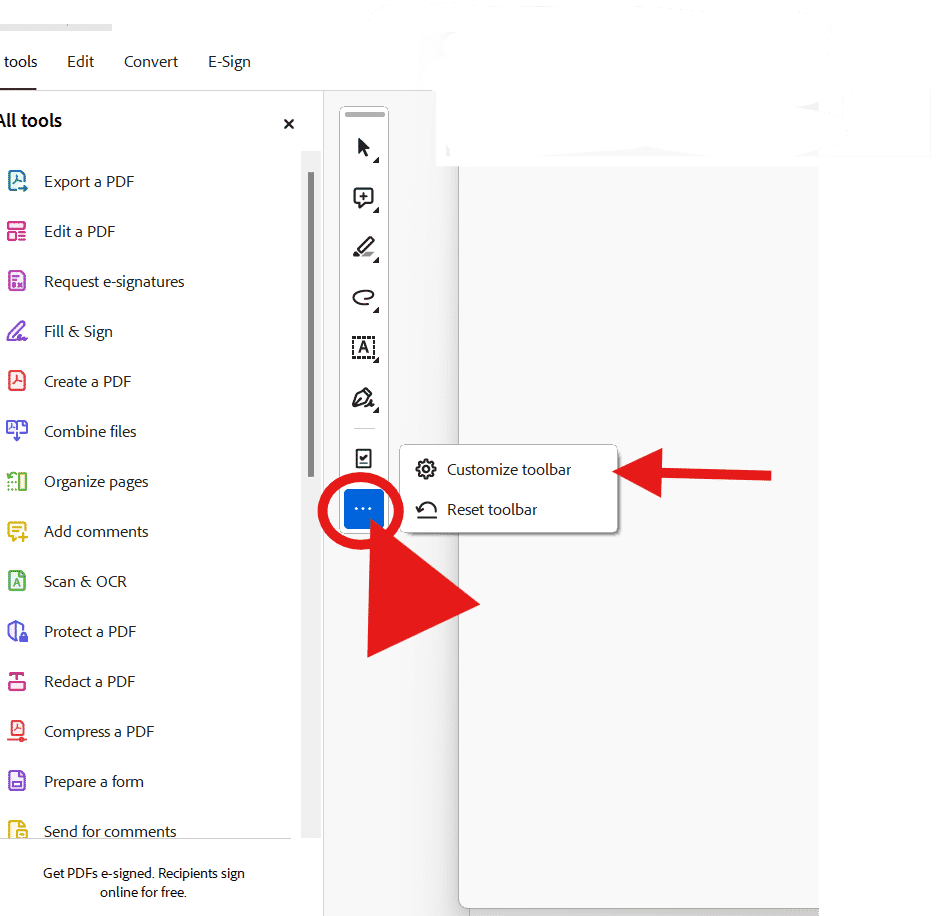
How to Add the Make Accessible Toolbar
Click on the three dots on the left and choose Customize Toolbar. Locate the Make Accessible Tool and add it to the toolbar.
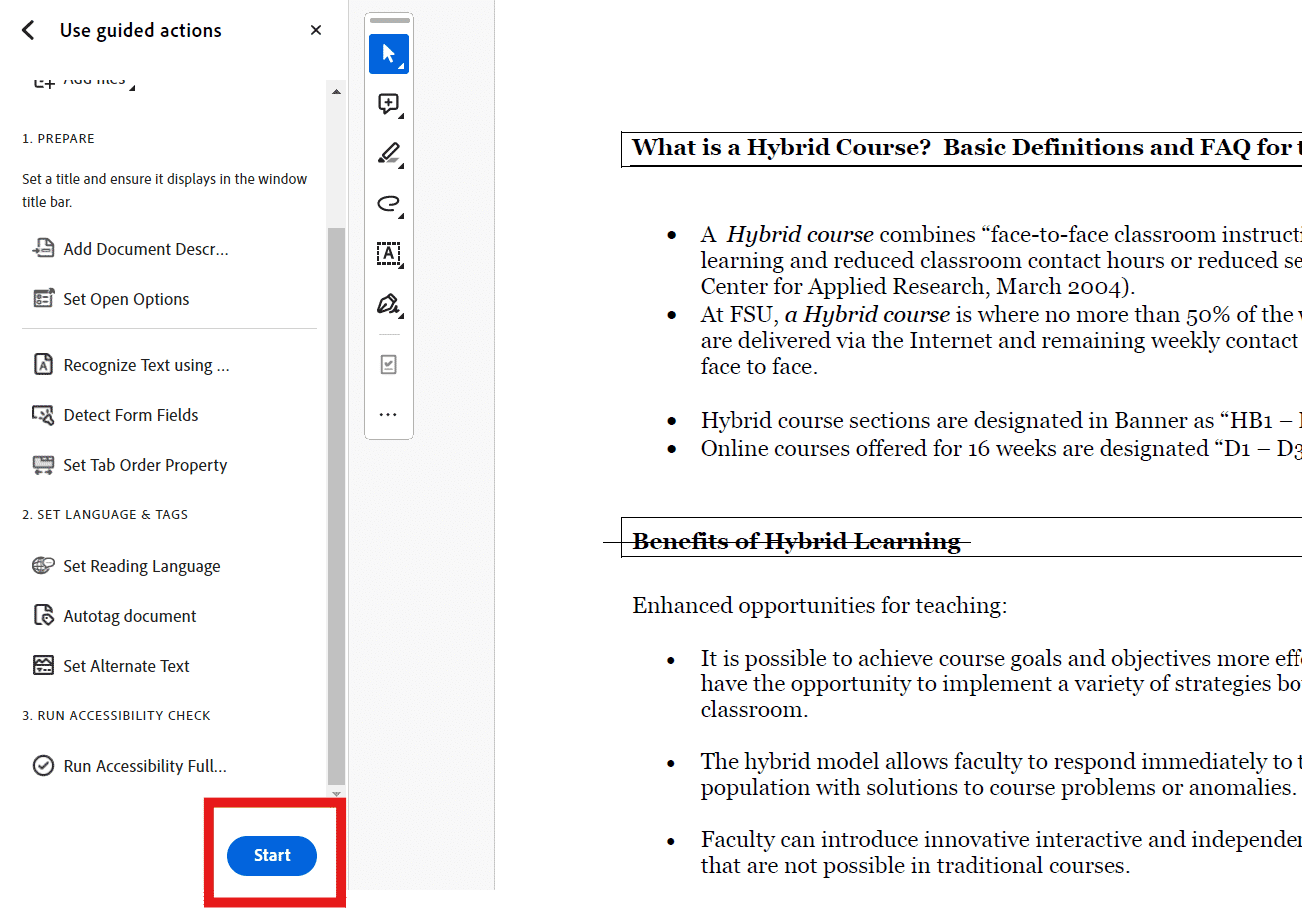
Start the Make Accessible Action
To start the Make Accessible Action, click on Make Accessible. Then, in the open tab, click 'Start'. You will be guided through the steps to make your PDF accessible.
Why add captions/transcripts
Captions and transcripts are beneficial for learners, including learners with disabilities, and learners whose language is not the language used in the video. Transcripts are also useful as a study guide. If a video has captions in more than one language, students can change the language depending on their learning needs.
Options for Adding Captions to Videos
The following are some of the current options for adding captions to your videos.
Microsoft Stream Captions & Transcripts
You can also request auto-generated captions, and transcripts or upload your own caption files in Microsoft Stream.
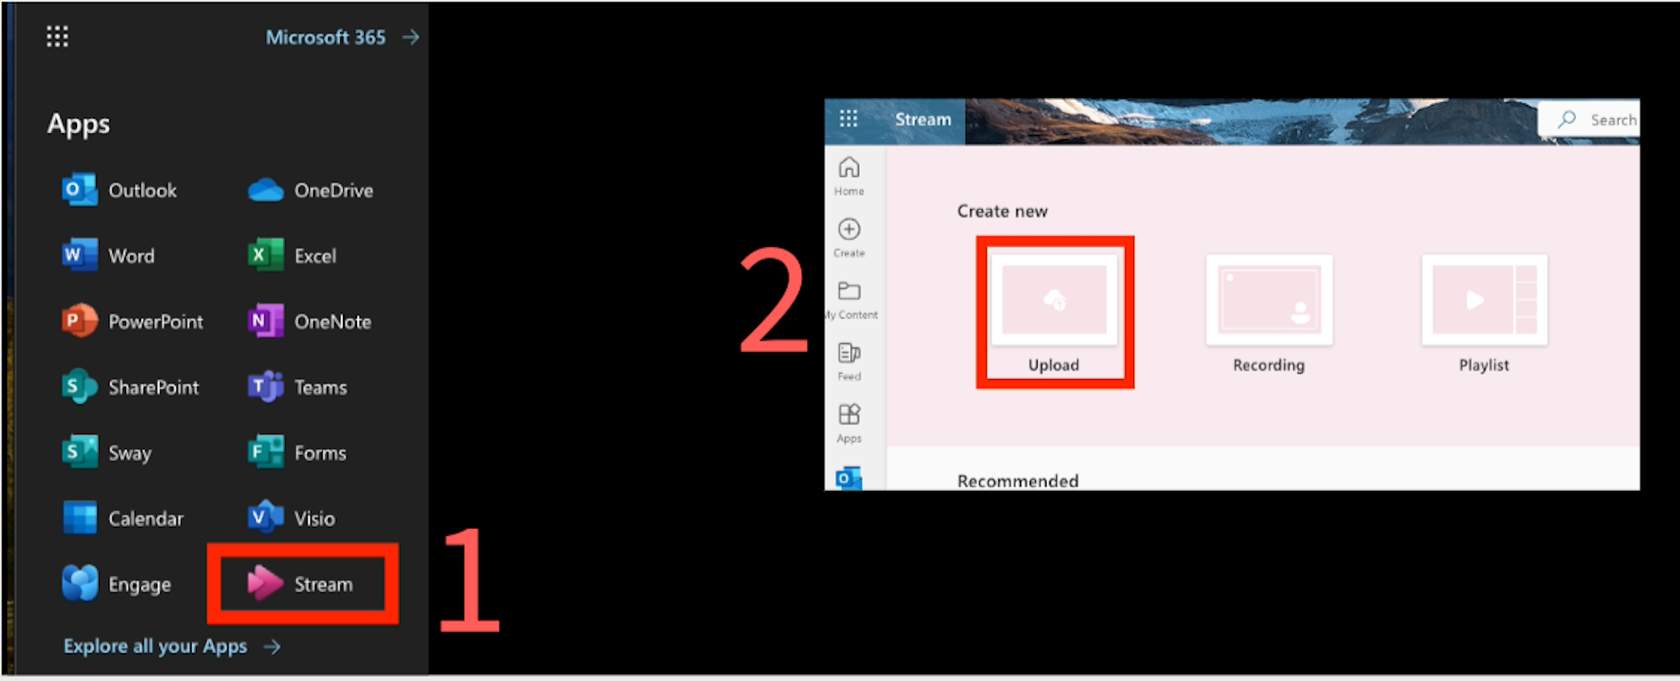
Step 1: Upload Video to Stream
If your video is not already in Stream, begin by uploading it. To upload a video, locate Stream on your MS 365 apps (1). In Stream, click on 'Upload' (2) and then locate the video from your machine.
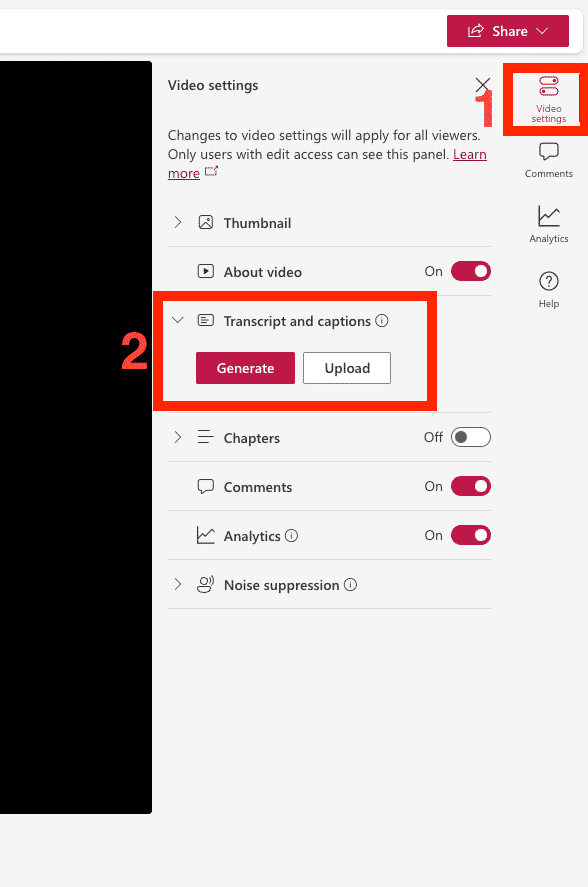
Step 2: Click on the Video to Access Caption & Transcript Request
Click on the video in your Stream library. Select 'Video Settings'(1) then 'Transcripts and Captions'(2).
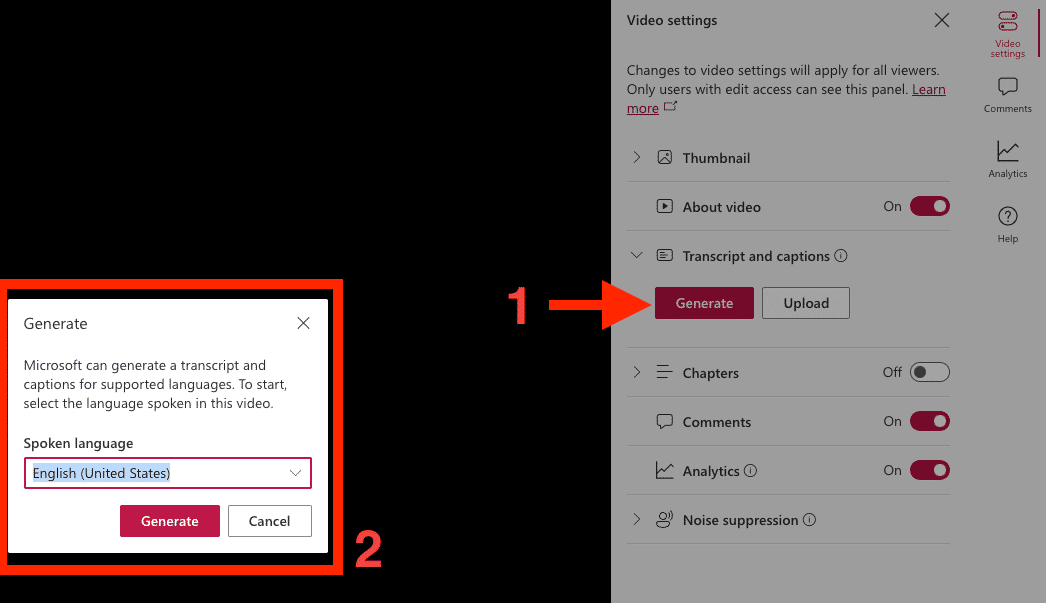
Step 3: Select Generate & Choose Language
Click on 'Generate'(1), then in the pop-up menu, select the language for the captions and click 'Generate'(2).
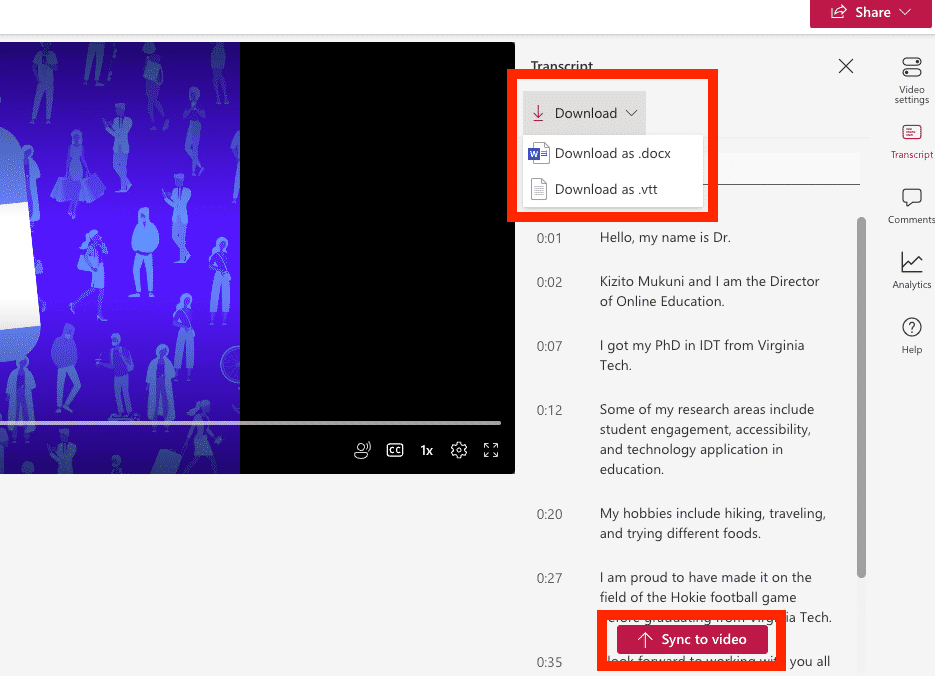
Step 4: Review and Sync Captions
Refresh your page to view the auto-generated captions. You can then check for accuracy and edit if needed. After editing the captions, select 'Sync to video'. You can also download the transcript as a .docx or .vtt file.
YouTube automatic captioning
YouTube has a free automatic caption generator option. However, the automatic captions are ‘generated by machine learning algorithms, so the quality of the captions may vary.’
If you have a video created in another software (Adobe Express, Canva, Canvas rich Content Editor, etc.), you can upload the video to YouTube to request auto-captions. You will need to create a YouTube account.
This section will cover how to use automatic captioning.

Step 1: Sign in to YouTube Studio.
Begin by signing in to YouTube Studio. If you do not have an account, create a free Google account.
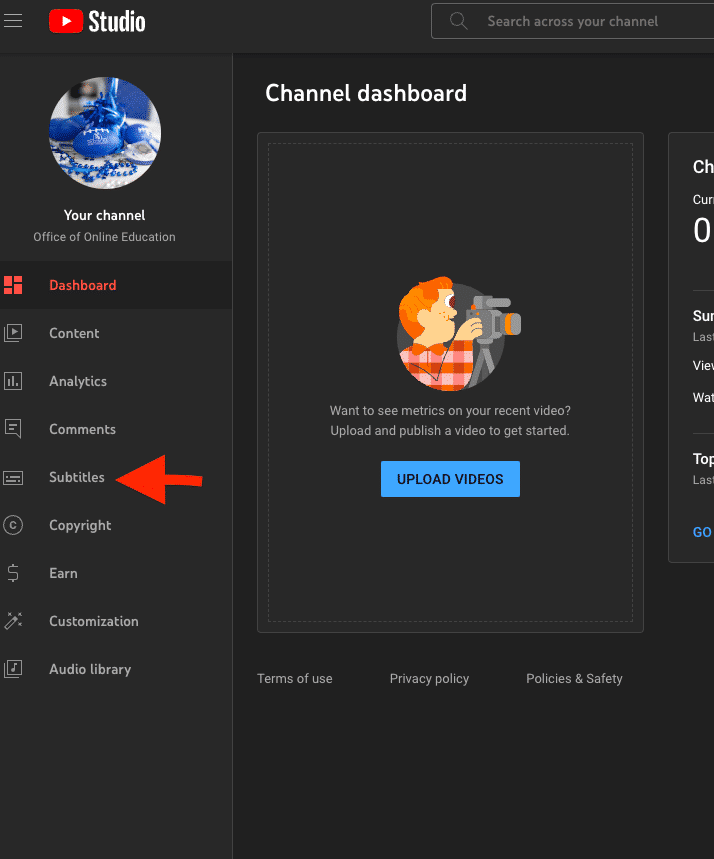
Step 2: Select Subtitles & click on the video
From the left menu, select Subtitles and Click the video you want to add captions or subtitles to.
Step 3: Edit Captions
- Under “Subtitles”, click More next to the subtitles you want to edit.
- Review automatic captions and edit or remove any parts that haven’t been properly transcribed.
Once you publish your video, viewers will be able to turn captions on/off. You can then copy the Embed link to your Canvas course.
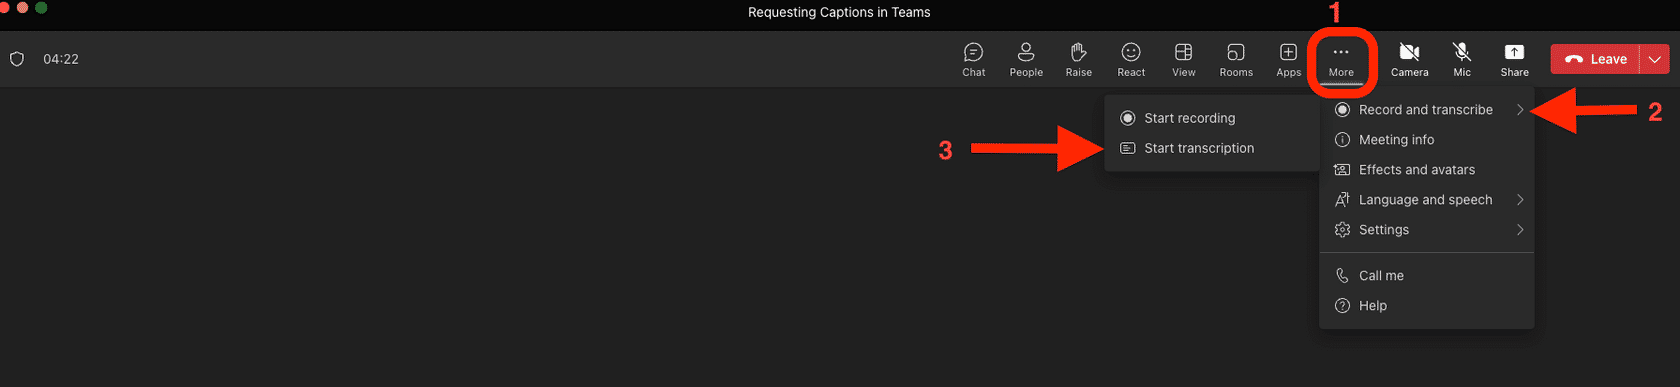
Teams live captions
You can turn on live captions in Teams meetings from the meeting controls. Teams can detect what’s said in a meeting and present real-time captions. If you're using the desktop app for Windows or Mac, there are also several caption customization options.
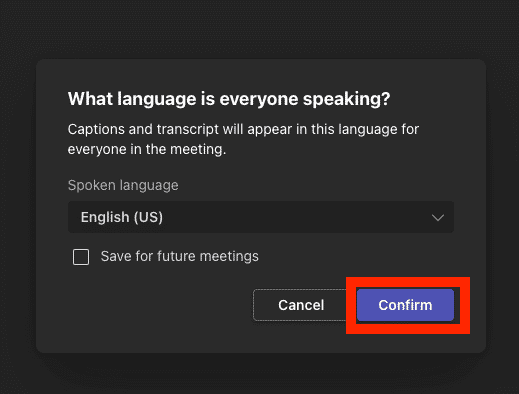
- To use live captions in a meeting, go to your meeting controls at the top of the screen and select the More... options button > Language and speech > Turn on live captions.
You can also select to hide your identity in meeting captions and transcripts in Microsoft Teams.

For more information on live captions, visit the Microsoft Support page.